
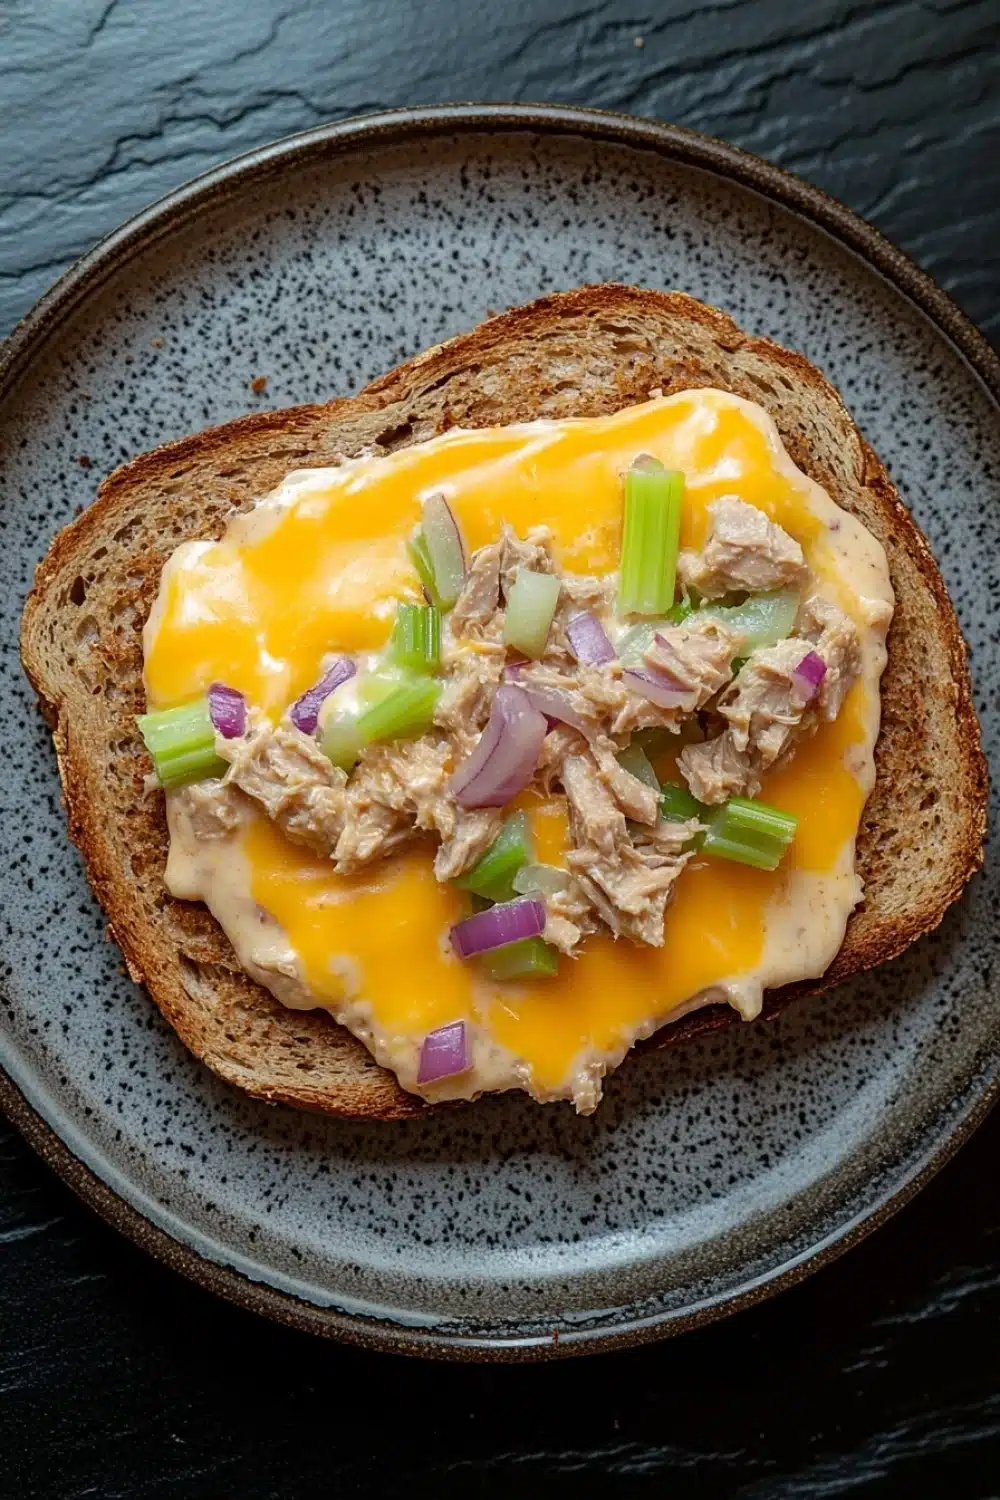
Cheese meets tuna—instant magic.
There’s something about an openfaced tuna melt sandwich that pulls me back to lazy afternoons and the simple joys of a quick kitchen score. The sizzle of cheddar bubbling atop creamy tuna salad feels like the ultimate comfort, especially when coaxed under a hot broiler. No fuss, just pure, melty satisfaction.
I remember the first time I nailed this—no fancy gadgets, just a trusty oven and some buttered whole wheat bread. The sharpness of the cheddar cuts through the mayo-laced tuna, while the mustard and celery add just enough crunch and zing to keep you hooked bite after bite. It’s the kind of no-nonsense meal that feels like it took a chef’s touch, but really, it’s kitchen wizardry anyone can whip up in 20 minutes.
Perfect for lunch or a light dinner, this openfaced tuna melt is a total game-changer when you wanna keep things cozy but not campy. Trust me, once you go open face, you don’t go back.
If you’re looking for a fresh side to complement your openfaced tuna melt sandwich, try this Crisp Cucumber Tomato Onion Salad with Creamy Ranch Magic for a perfect pairing.
Real Life Benefits of the Open-Faced Tuna Melt Sandwich
- Ready in just 20 minutes—perfect for those no-fuss lunch breaks when you’re juggling a million things.
- The combo of sharp cheddar and zesty Dijon mustard adds a punch that takes this humble sandwich way beyond basic.
- Uses pantry staples—tuna, mayo, bread—making it a go-to when you’re low on fresh groceries but still crave something tasty.
- Open-faced style means fewer carbs without sacrificing the melty cheese goodness. Win-win for light eaters.
- Leftover tuna salad keeps for two days in the fridge, so you can whip up a fresh melt anytime without extra prep.
Open-Faced Tuna Melt Sandwich
- Total Time: 20 minutes
- Yield: 2 1x
Description
A warm and comforting open-faced tuna melt sandwich featuring creamy tuna salad topped with melted cheddar cheese on toasted bread. Perfect for a quick lunch or light dinner.
Ingredients
1 (5 ounce) can tuna packed in water, drained
3 tablespoons mayonnaise
1 tablespoon finely chopped red onion
1 tablespoon finely chopped celery
1 teaspoon lemon juice
1/4 teaspoon salt
1/8 teaspoon black pepper
2 slices whole wheat bread
4 slices sharp cheddar cheese
1 tablespoon unsalted butter, softened
1 teaspoon Dijon mustard
Instructions
Preheat the broiler on high and position the oven rack about 6 inches from the heat source.
In a medium bowl, combine the drained tuna, mayonnaise, chopped red onion, chopped celery, lemon juice, salt, and black pepper. Mix well until all ingredients are evenly incorporated.
Spread the softened butter evenly on one side of each bread slice.
Place the bread slices butter-side down on a baking sheet.
Spread a thin layer of Dijon mustard on the top side of each bread slice.
Divide the tuna salad evenly and spread it over the mustard-coated side of each bread slice.
Top each open-faced sandwich with two slices of cheddar cheese, covering the tuna salad completely.
Place the baking sheet under the broiler and broil for 3 to 5 minutes, or until the cheese is melted, bubbly, and lightly browned. Watch carefully to prevent burning.
Remove the sandwiches from the oven and let them cool for 1 minute before serving.
- Prep Time: 10 minutes
- Cook Time: 10 minutes
Explore more:
Lunch Recipes
Mastering the Open-Faced Tuna Melt: Tricks, Tweaks, and Troubleshooting
The Cheesiest Swap: When Sharp Cheddar Isn’t Your Jam
Let me drop a nugget from my kitchen: not all cheese melts the same, and cheddar can be a diva. If your sharp cheddar is giving you a crust more burnt than golden, try swapping it for a milder American or a Swiss slice. These guys melt smoother and won’t turn your tuna melt into a charred mess under the broiler’s watchful eye. If you’re feeling adventurous—hello, Monterey Jack or even provolone—go big or go home. But beware: each swap shifts the flavor landscape dramatically. Got leftover mozzarella? Throw it on for a stringy, gooey experience that plays well with the salty tuna punch. Trust me, cheese is the real MVP here, and picking the right sidekick ensures your melt hits that perfect note every time.
Butter, Mustard, and Toast—The Triple Threat Explained
Here’s the tea on buttering bread for a tuna melt: slathering butter on the bottom side of the bread before toasting is non-negotiable. Why? That thin butter layer creates a golden barrier—a crispy, buttery crust that keeps sogginess at bay. I’ve seen plenty of fledgling cooks slap toppings on dry bread and get a sad, limp sandwich. No bueno.
And mustard? It’s not just a tangy add-on; it’s a flavor bomb that cuts through the mayo’s richness and the tuna’s briny heft. Mustard is the secret weapon that wakes up the palate, pulling the whole ensemble together. Spread it thin but don’t skip it—it’s the little edge that turns a good tuna melt into a keeper.
Toast matters too. Whole wheat bread’s nutty character stands up well to all the creamy, cheesy goodness, but make sure it’s toasted enough to hold the weight without turning into mush. This isn’t some sad soggy picnic; it’s a powerhouse sandwich demanding respect.
Broiler Blues: Avoiding the Blackened Disaster
Watch the broiler like a hawk. Seriously. The difference between a melty, bubbling tuna melt and a blackened blob is seconds under the flame. Here’s my battle-tested hack: set your timer for 3 minutes, stay glued to the oven, and peek every 30 seconds after that. Broilers are fickle—some blast heat like a dragon, others are more gentle giants. If you notice smoke or burnt edges, pull the pan out pronto. No one wants to fish out a charcoal brick masquerading as lunch.
Pro tip—don’t skip the oven rack placement. Keeping it about 6 inches from the heat source is golden. Too close, and you’re playing with fire. Too far, and the cheese never hits that perfect golden bubble zone. It’s a tightrope walk but once you nail it, your tuna melts come out with that irresistible bubbly top and warm, creamy center every single time.
Open-Faced Tuna Melt Sandwich FAQs
A: Yes, you can—and it’ll add a richer taste. Just drain it well to avoid soggy bread.
A: Nope! Dijon adds a nice tang, but plain yellow mustard or even a smear of mayo works. It’s all about what you fancy that day.
A: Buttering the bread and broiling quickly is key. The butter creates a protective barrier, and the broiler’s quick heat crisps up the edges, preventing the dreaded soggy bottom.
A: Absolutely. Make the tuna salad up to two days in advance and keep it chilled. Just assemble and broil your sandwich fresh when you’re ready to eat for the best crunch-to-creamy ratio.
A: Yes. It’s filling without being heavy—a perfect quick fix when you want something warm but not a full-on feast. Pair it with a side salad or some pickles and you’re golden.