
Fish frenzy in the kitchen!
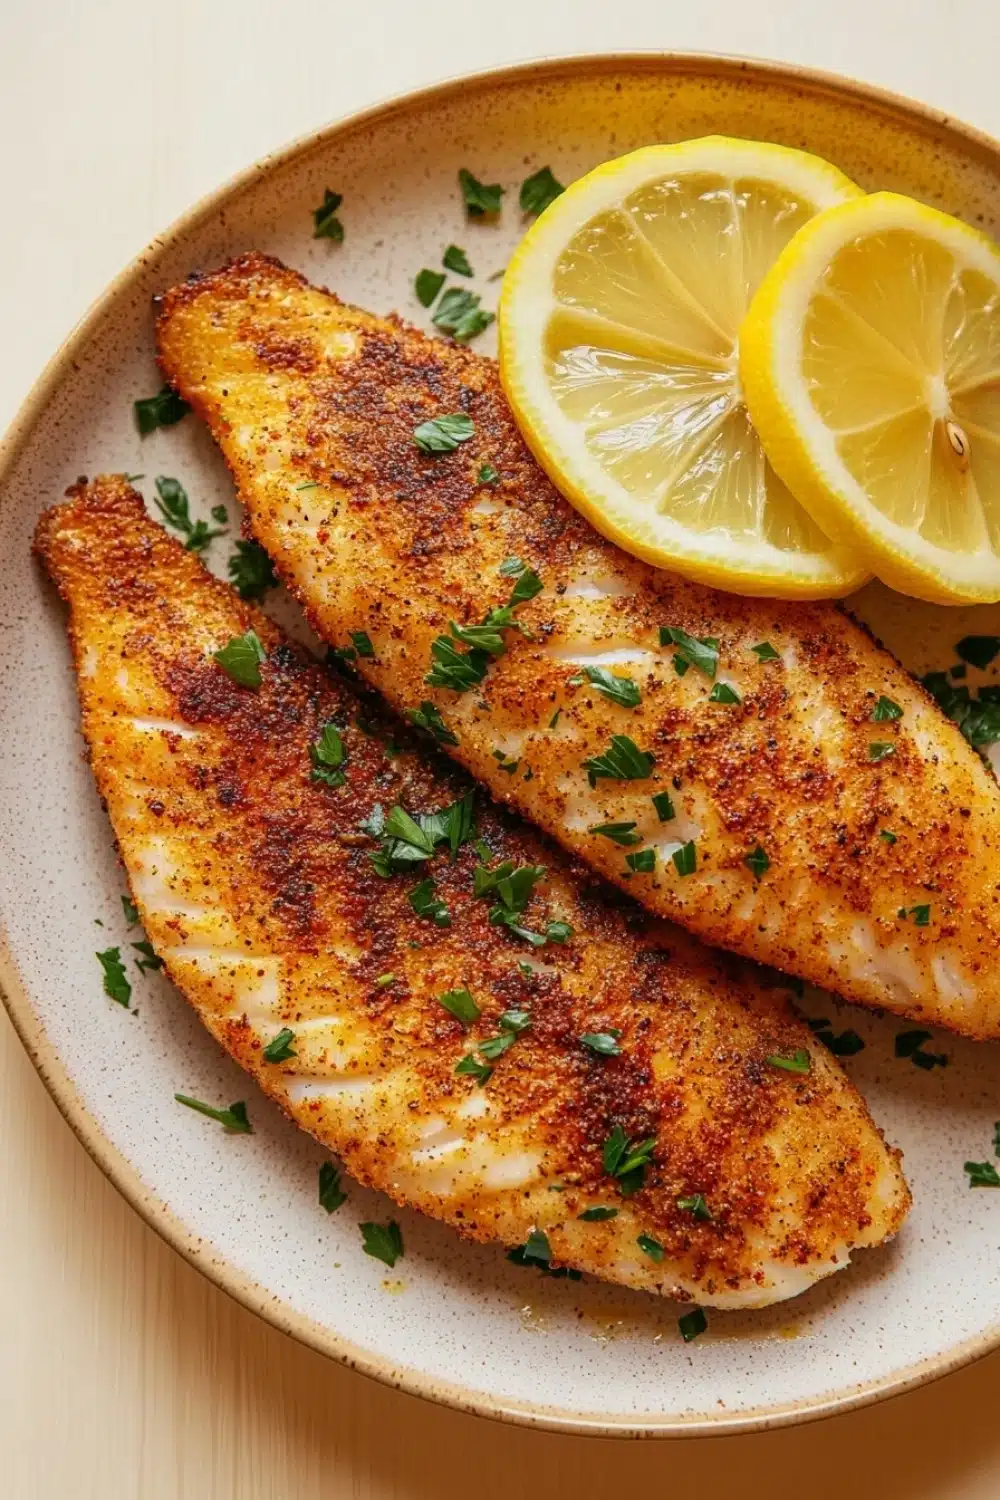
The air fryer hums softly as I prep the tilapia loins—each slice glistening with a garlicky, herby olive oil rub. The lemon slices sit ready like little sunny shields, promising a bright pop of citrus amid the paprika’s whisper. I’ve always thought air frying fish was a bit of a gamble—too dry, too bland—but this method flips the script completely.
In under twenty minutes, the magic happens. The fish cooks through, skinless and flaky, with edges slightly crisped—just the way I like it. It’s a no-muss, no-fuss approach, perfect for weeknights when you want a solid plate without playing short-order cook.
Grab your basket — it’s time to crank up the heat and throw down some seriously easy, flavorful tilapia loin.
For another easy and healthy seafood option, try this Quick Air Fryer Shrimp and Vegetables for a Healthy Dinner recipe that’s just as delicious as tilapia loin air fryer dishes.
Real-Life Wins from Air Fryer Tilapia Loin
- Ready in under 20 minutes—perfect for those hectic weeknights when the clock’s ticking louder than your stomach.
- Simple seasoning means no need for a pantry full of fancy spices; garlic, lemon, and herbs are all you need to bring the flavor.
- The air fryer crisps the edges just right, giving you a light crust without drowning the fish in oil—goodbye greasy mess!
- Meal preppers, listen up: this dish stores well and reheats quickly without turning into rubber, keeping your lunches on point.
- Low-carb and packed with protein, it’s a no-brainer for anyone looking to eat clean without sacrificing taste or time.

Air Fryer Tilapia Loin
- Total Time: 17 minutes
- Yield: 2 1x
Description
A quick and healthy recipe for perfectly cooked tilapia loin using an air fryer. This dish is seasoned simply with lemon, garlic, and herbs for a light and flavorful meal ready in under 20 minutes.
Ingredients
2 tilapia loins (about 6 ounces each), thawed if frozen
1 tablespoon olive oil
1 teaspoon garlic powder
1 teaspoon dried parsley
1/2 teaspoon paprika
1/2 teaspoon salt
1/4 teaspoon black pepper
1 lemon, sliced into thin rounds
Fresh lemon wedges, for serving
Instructions
Preheat the air fryer to 400°F (200°C) for 3 minutes.
Pat the tilapia loins dry with paper towels to remove excess moisture.
In a small bowl, mix together the olive oil, garlic powder, dried parsley, paprika, salt, and black pepper.
Brush both sides of each tilapia loin evenly with the seasoned olive oil mixture.
Place the tilapia loins in the air fryer basket in a single layer, making sure they do not overlap.
Top each tilapia loin with 2-3 thin lemon slices.
Cook in the air fryer at 400°F (200°C) for 10-12 minutes, or until the fish flakes easily with a fork and reaches an internal temperature of 145°F (63°C).
Carefully remove the tilapia loins from the air fryer and transfer to serving plates.
Serve immediately with fresh lemon wedges on the side.
- Prep Time: 5 minutes
- Cook Time: 12 minutes
Explore more:
Dinner Recipes
Mastering Air Fryer Tilapia: Tips, Tricks, and Fixes
The Swap That Saves Your Fish Game
Sometimes, you just don’t have tilapia on hand—or maybe you’re chasing a slightly different vibe on the flavor front. No stress. Swapping tilapia for cod or haddock works like a charm; both have that mild profile and flaky texture that air fryers love. If you want a touch more punch, try swapping olive oil for avocado oil. It’s got a higher smoke point and a buttery finish that crispifies the crust without burning your precious fish. And hey—if you’re feeling fancy or want to shake things up, toss a pinch of smoked paprika instead of regular paprika. It adds a subtle campfire note without overpowering the lemon and garlic. Trust me, these swaps keep you in the game and your taste buds guessing.
Why That Lemon Slice Trick Works Every Time—and Other Secrets
Air frying fish can be a tightrope walk between drying out your fillet and undercooking it. Here’s the play: layering thin lemon slices on top acts like a mini steamer—trapping moisture and infusing zing simultaneously. Genius, right? The lemon’s natural oils drip down, bathing the fish and keeping it juicy. Meanwhile, the garlic powder, dried parsley, and paprika create a flavor crust that’s both simple and punchy—no need to get fancy with a marinade that takes hours. Another golden nugget? Pat your fish dry before seasoning. It’s a game-changer to get that crisp exterior. Moisture is the enemy of texture here—keep it dry, season it right, and let the air fryer do its magic for 10-12 minutes at 400°F. Don’t forget to check for flakiness with a fork—it’s the no-BS way to know you nailed it.
Oops-Proof Your Tilapia: Fixing Common Air Fryer Fails
Burnt edges? Too dry? Fish still raw in the middle? Been there. Here’s how to dodge those pitfalls like a pro. First off—don’t crowd your basket. Overlap equals steam bath, and nobody wants soggy fish masquerading as crispy. If you notice your edges crisping too fast, dial the temp back to 375°F after the first 6 minutes, then finish cooking. Patience pays off.
Dryness? That’s usually a moisture loss issue. Brushing on that olive oil mix generously before cooking is your first line of defense. Don’t skimp. And if leftovers are your jam, reheat low and slow (350°F max) so you don’t end up with an air-fried fish jerky.
Finally, for that stubborn undercooked middle, give your final product a quick poke with a fork to test flakiness before pulling it out. If it resists, toss it back in for 2 more minutes. Remember: air fryers vary, so you gotta know your machine’s quirks.
Air Fryer Tilapia Loin FAQ
A: Yes, but thaw them completely before cooking. This ensures even cooking and avoids that dreaded soggy center—nobody wants that.
A: The fish should flake easily with a fork and hit an internal temp of 145°F (63°C). I always keep a digital meat thermometer handy—no guesswork, just spot-on results every time.
A: You can swap it out for fresh minced garlic—just halve the amount since fresh garlic packs a stronger punch than powder. Or, skip it if you’re in a bind; the paprika and parsley carry the flavor well enough.
A: Yes and no. Air frying crisps up the edges faster and keeps the inside juicy without drying out—a real game-changer if you’re tight on time. Baking is more forgiving but takes longer.
A: Absolutely! Just increase the ingredients proportionally, but be sure not to overcrowd the air fryer basket. Cook in batches if needed to keep that perfect crisp on each filet.