
Start with nothing complicated.
There’s a magic in tossing flour, yogurt, and a sprinkle of baking soda into a bowl and calling it a day. No kneading, no fuss—just a rustic dough that’s sticky and wild, begging for some hands-on love but demanding patience instead. It’s like the dough is doing the heavy lifting while you kick back.
I’ve often found that this recipe is the perfect way to break the “I-can’t-bake-bread” curse. After mixing, I cover the bowl and forget about it overnight, letting nature do its slow dance. The next day, the kitchen fills with that unmistakable yeasty aroma, promising a crust with character and a crumb that’s moist with a whisper of tang from the yogurt. It’s downright comforting—like a warm hug from the oven.
This bread is a true game-changer for those who hate wrestling dough but crave fresh, homemade bread. Plus, it’s versatile enough to pair with anything—from jam-slathered breakfast slices to hearty dinner sandwiches. And yes, it’s a total showstopper when you want to bring something impressive with hardly any elbow grease involved.
For a delicious and easy recipe, check out our Banana Muffin Rustic Bread: A Hearty Twist on Classic Comfort that pairs perfectly with no knead bread with yogurt.
Why You’ll Love No Knead Bread with Yogurt
- Hands-off magic: Mix, rest overnight, then bake—minimal fuss, maximum return.
- The yogurt twist adds a subtle tang and keeps every crumb moist and tender—no dry bites here.
- Perfect for rookies who dread kneading; this recipe skips the elbow grease but keeps all the charm.
- Cook once, enjoy all week—store at room temp in a paper bag or freeze for a month to keep it fresh.
- Rustic crust that crackles on the outside but melts in your mouth—great for dunking or slathering with butter.

No Knead Bread with Yogurt
- Total Time: 50 minutes
- Yield: 8 slices 1x
Description
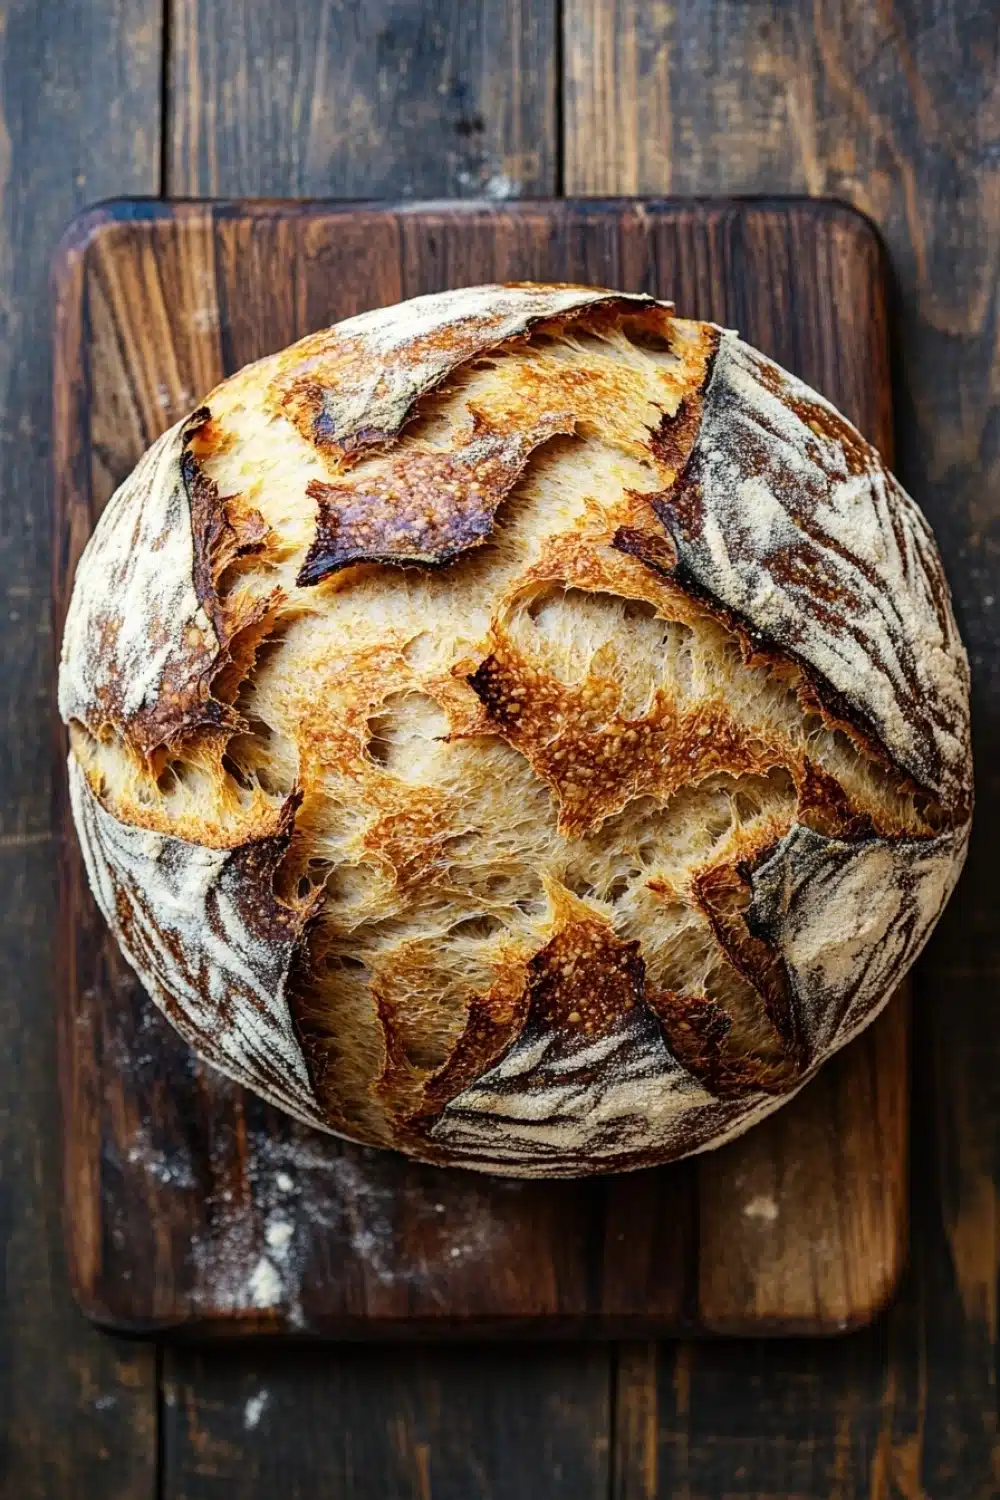
A simple and delicious no knead bread recipe that uses yogurt to create a moist, tender crumb and a slightly tangy flavor. Perfect for beginners and requires minimal effort.
Ingredients
3 cups all-purpose flour, plus extra for dusting
1 teaspoon salt
1 teaspoon baking powder
1 teaspoon baking soda
1 cup plain yogurt (full-fat or low-fat)
1/2 cup warm water (about 110°F)
Instructions
In a large mixing bowl, whisk together the flour, salt, baking powder, and baking soda until well combined.
Add the plain yogurt and warm water to the dry ingredients.
Using a wooden spoon or your hands, mix until a sticky dough forms. The dough will be shaggy and sticky; do not overmix.
Cover the bowl with a clean kitchen towel or plastic wrap and let it rest at room temperature for 8 to 12 hours, or overnight, to allow the dough to rise and develop flavor.
After resting, preheat your oven to 450°F (230°C). Place a heavy oven-safe pot or Dutch oven with its lid inside the oven to heat for 30 minutes.
Lightly flour a clean surface and turn the dough out onto it. With floured hands, gently shape the dough into a round loaf without kneading.
Carefully remove the hot pot from the oven and place the dough inside. Cover with the lid.
Bake covered for 30 minutes, then remove the lid and bake for an additional 10 minutes to brown the crust.
Remove the bread from the oven and transfer it to a wire rack. Let it cool completely before slicing.
- Prep Time: 10 minutes
- Cook Time: 40 minutes
Explore more:
Breakfast Recipes
Mastering No-Knead Yogurt Bread: Tricks, Tweaks, and Troubleshooting
The Magic Behind Yogurt in No-Knead Bread
Yogurt isn’t just a tangy addition—it’s the secret agent in this recipe that changes everything. Unlike traditional bread doughs that rely solely on yeast and long kneading, this one banks on yogurt’s natural acidity and moisture to tenderize gluten strands and boost rise without the elbow grease. The result? A crumb that’s moist, soft, and slightly tangy, almost like a lazy sourdough with less fuss.
Why does this matter? Because when you forgo kneading, you need something to step in and do the heavy lifting. Yogurt’s lactic acid reacts with the baking soda and baking powder—yep, you read that right, both leaveners are in play—to create extra lift and an open crumb without waiting forever. Plus, those probiotics? They add a subtle complexity that’s hard to fake with plain water. I’ve tried swapping yogurt for buttermilk once—it worked but lost some of that thick, creamy punch. So, stick to yogurt for that signature tang and texture.
The Art of the No-Knead Shape — Don’t Go Overboard
Here’s where many home bakers trip up: the shaping. When you’re dealing with a sticky, shaggy dough that’s been resting all night, your natural instinct might be to punch it down or knead vigorously. Stop right there. This dough wants gentle love—flour your hands, lightly coax it into a round loaf shape, and that’s it. No aggressive folding or slapping.
Why? Overworking kills those precious air bubbles—imagine popping balloons you spent all night inflating. You want to trap those gases for a light, airy crumb. Think of it as handling a newborn bird—firm enough to support, but gentle enough to not crush. I learned this the hard way; the first batch was dense because I got too enthusiastic with folding. Lesson learned: less is more.
Busted Crust or Dense Middle? Fixes That Save Your Loaf
If your crust turns out pale and floppy, or worse, the middle stays doughy and heavy, don’t despair. The likely culprit is oven temperature and baking time. This recipe calls for a scalding 450°F preheated Dutch oven—this is no joke. The hot pot simulates steam, giving you that coveted crust crispiness and oven spring. If your crust is limp, you probably skipped preheating or didn’t bake uncovered at the end.
Dense middles often mean underbaking or a dough that was too wet. Next time, trim your water slightly—aim for a sticky ball that just pulls away from the bowl. And if you’re in a high-altitude or dry climate, a dash more water might help instead. Every kitchen’s a microclimate, so it’s about tuning in.
Lastly, resist slicing while warm. That steam you see escaping is still setting up the crumb structure. Cut too soon, and you get a gummy mess. I swear by waiting at least an hour—patience is your sous-chef here.
No Knead Bread with Yogurt: FAQs
A1: Yes! That long rest is the secret sauce. It lets the flavors develop and the dough get that perfect tangy kick. If you’re in a rush, you might get some rise with 4-6 hours, but overnight is the gold standard.
A2: You can, but tread carefully. Non-dairy yogurts vary a lot in thickness and tanginess, which can mess with the texture and flavor. If you try it, pick a thick, plain version and expect some trial and error.
A3: Absolutely. Baking inside a hot Dutch oven traps steam, giving you a crust that’s crispy and crackly—just the way we bread nerds love it.
A4: You can, but it’s a different ball game. The Dutch oven simulates a professional steam oven, which you can’t easily replicate on a tray. Your crust will be less crunchy and more rustic.
A5: 3 days at room temp in a paper bag or bread box. For anything beyond that, toss it in the freezer wrapped tight. Thaw before slicing to keep it from going gummy.