
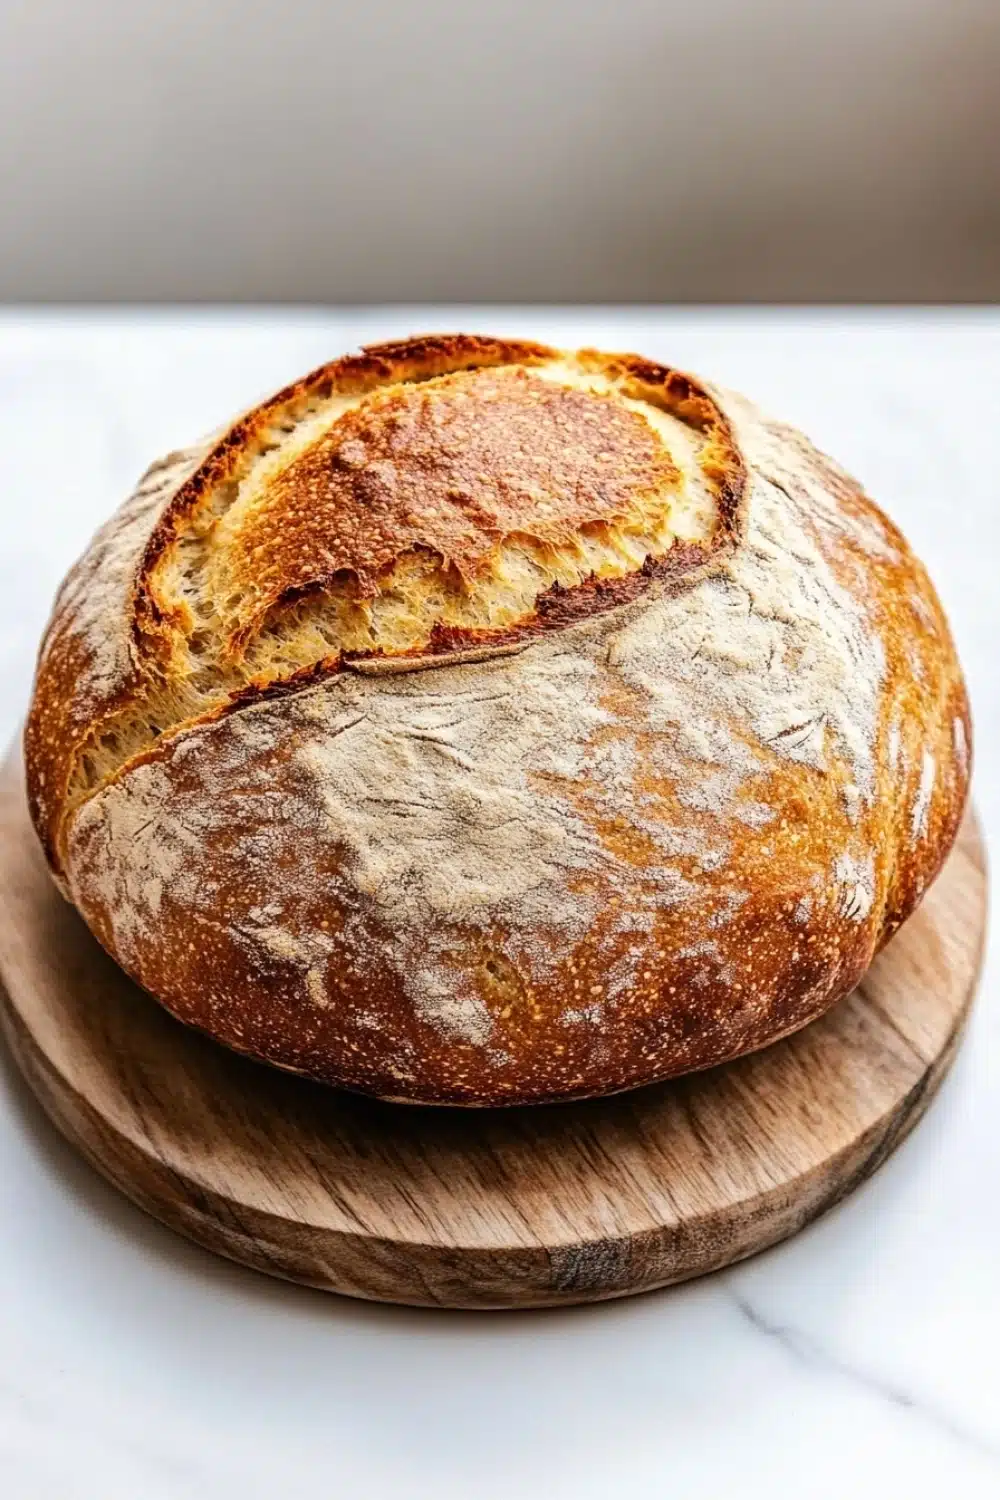
Bread baking is magic. Period.
There’s something almost hypnotic about watching dough bubble up, doubling in size under a warm kitchen towel—like it’s alive and growing just for you. It’s one of those moments where time stretches and the clatter of the outside world dulls to a hum. The yeast—tiny, tireless workers—transform simple flour and water into something unexpectedly cozy.
My first time baking vegan yeast bread, I was skeptical. No eggs or dairy, just a few pantry staples and a bit of patience. Yet, kneading that soft dough, feeling it spring back, it hit me: this loaf wasn’t just bread. It was a warm invite, a fluffy canvas waiting for all the plant-based fixins. No need to be a dough whisperer or a kitchen ninja—just some elbow grease and a pinch of faith in the yeast’s hustle.
Ready to roll up your sleeves? Let’s get down to the nitty-gritty and bake a loaf that’s as fluffy as a cloud and as homey as grandma’s kitchen on a Sunday morning.
For a delicious twist on your morning meal, try our guide on How to Make the Ultimate Breakfast Sandwich on Sourdough Bread using vegan yeast bread.
Real Life Benefits of Baking This Vegan Yeast Bread
- Freshly baked bread fills your kitchen with a warm, yeasty aroma that’s pure home comfort—no store-bought loaf can come close.
- Soft and fluffy texture means you get perfect sandwiches every time, whether it’s a classic PB&J or a stacked veggie delight.
- Vegan-friendly ingredients keep it cruelty-free and simple, so you can avoid those hidden animal byproducts that sneak into commercial breads.
- Homemade bread saves you cash in the long run—no more overpriced artisan loaves that empty your wallet.
- Making dough from scratch turns into a meditative kitchen ritual, helping to zap stress and keep your hands happily busy while the yeast works its magic.
Vegan Yeast Bread
- Total Time: 1 hour 45 minutes
- Yield: 12 slices 1x
Description
A classic, soft, and fluffy vegan yeast bread made without any animal products. Perfect for sandwiches, toast, or simply enjoying fresh with vegan butter.
Ingredients
3 1/2 cups (420 grams) all-purpose flour, plus extra for kneading
1 packet (2 1/4 teaspoons) active dry yeast
1 1/4 cups (300 ml) warm water (105°F to 115°F)
2 tablespoons granulated sugar
2 tablespoons vegetable oil
1 teaspoon salt
Instructions
In a small bowl, combine warm water and sugar. Stir until sugar dissolves.
Sprinkle the active dry yeast over the water and let it sit for 5 to 10 minutes until it becomes frothy.
In a large mixing bowl, whisk together the flour and salt.
Make a well in the center of the flour mixture and pour in the yeast mixture and vegetable oil.
Stir with a wooden spoon or dough hook until the dough begins to come together.
Turn the dough out onto a lightly floured surface and knead for about 8 to 10 minutes until smooth and elastic. Add small amounts of flour as needed to prevent sticking, but avoid adding too much.
Place the kneaded dough in a lightly oiled bowl, cover with a clean kitchen towel or plastic wrap, and let it rise in a warm, draft-free place for about 1 hour or until doubled in size.
Punch down the risen dough to release air bubbles and shape it into a loaf.
Place the dough into a greased 9×5-inch loaf pan and cover it again. Let it rise for another 30 to 40 minutes until it has risen about 1 inch above the pan.
Preheat the oven to 375°F (190°C).
Bake the bread for 25 to 30 minutes until the top is golden brown and the loaf sounds hollow when tapped.
Remove the bread from the oven and let it cool in the pan for 10 minutes.
Transfer the bread to a wire rack and let it cool completely before slicing.
- Prep Time: 15 minutes
- Cook Time: 30 minutes
Explore more:
Breakfast Recipes
Mastering Your Vegan Yeast Bread: Tips and Tricks
The Flour Factor—Why It Makes or Breaks Your Loaf
All-purpose flour is the go-to for a reason—it hits that sweet spot between protein content and texture, giving your bread enough structure without turning it into a brick. But here’s the kicker: not all flours are created equal. Depending on where you live, the protein content in your flour can vary wildly. I once grabbed a bag from a local mill, and my usual dough turned into a sticky mess that refused to rise properly. So, if you find your dough either too slack or too tough, consider swapping in bread flour for a bit more gluten strength or even a touch of whole wheat for flavor complexity—just don’t overdo it, or your loaf might turn into a dense doorstop.
How to Nail the Rise—Warmth, Timing, and Yeast TLC
Yeast is a diva. It demands a warm environment—not too hot, not too cold—to get that bubbly action going. Think Goldilocks zone, 105°F to 115°F. If your water’s hotter, say, over 120°F, you’re essentially giving your yeast a hot poker—goodnight, yeast! Too cold, and it’ll just snooze, no fluff in sight. After mixing, cover your dough and let it lounge in a cozy spot, away from drafts—the oven light on works wonders. Patience here is key: rushing leads to underproofed dough that’s tight and chewy, while waiting too long can make it overproofed and collapse. I swear by poking the dough gently with a finger—if the indentation springs back slowly but not completely, you’re golden.
When Your Bread Flops—Common Snafus and Fixes
Flat loaf? Dense crumb? Hard crust? Let’s troubleshoot—
- Flat Loaf: Probably underproofed or yeast was dead. Always test yeast freshness with the frothy bloom step—no bubbles, no rise.
- Dense Texture: Overkneading can tighten the gluten too much, or underkneading leaves it slack. Aim for smooth and elastic, not stiff or sticky.
- Hard Crust: Your oven might be running hot. Use an oven thermometer. Also, avoid overbaking—check for that hollow thump when tapped.
And here’s a nugget—I’ve saved many a loaf by spritzing water into the oven before baking to create steam. It keeps the crust from becoming a rock-hard shell. Try it next time and watch your bread’s crust soften up nicely.
Vegan Yeast Bread FAQs
A1: Yes, you can! Use the same amount of instant yeast but skip the proofing step—just mix it directly with the flour and liquids. Instant yeast is the shortcut that keeps your dough jumpin’ without waiting around.
A2: Dense bread usually means the yeast didn’t get enough time to work its magic or the dough was kneaded too little or too much. Also, water temperature matters—a chilly bath won’t wake the yeast up. Make sure your water’s in the 105°F to 115°F sweet spot. Patience is key—give it that gentle rise, no rush!
A3: You can swap in whole wheat, but heads-up—it’ll change the texture and density. Whole wheat grabs more moisture, so you might need to up the water slightly. Expect a heartier loaf with a nuttier flavor. It’s a trade-off between fluffy cloud and wholesome bite.
A4: Absolutely! Olive oil adds a nice depth of flavor, but it can make the bread a bit denser. If you’re game for a slightly heavier crumb and a hint of fruity richness, olive oil’s your buddy.
A5: Yes, store it at room temperature in an airtight container or plastic bag for up to 3 days. For the long haul, slice and toss it in the freezer sealed tight—toast slices frozen straight from the freezer for a quick fresh fix. No funky freezer burn with this trick!