
Patience pays off.
There’s something almost primal about the way bread bakes in a Dutch oven—the steam trapped inside creates that perfect crust without any fuss. I remember the first time I tried this method: the kitchen was quiet except for the ticking oven timer and the scent that slowly unfurled, thick and warm, like a well-kept secret finally told.
The magic lies not in elbow grease but in timing and trust. You mix, fold, and forget—letting the dough bubble and rise with minimal intervention. Two hours later, you’re rewarded with a loaf that looks like it belongs in some rustic bakery rather than your everyday kitchen.
This isn’t just bread; it’s the art of simplicity. No fancy gadgets, no marathon kneading sessions—just a little yeast, flour, and a Dutch oven doing all the heavy lifting. Ready to roll up your sleeves (well, almost) and make some crusty joy? Let’s dive in.
If you’re interested in a simple and efficient method, check out our guide on How To Make Soft, Fluffy Vegan Yeast Bread From Scratch for tips on no knead bread in a Dutch oven in just 2 hours.
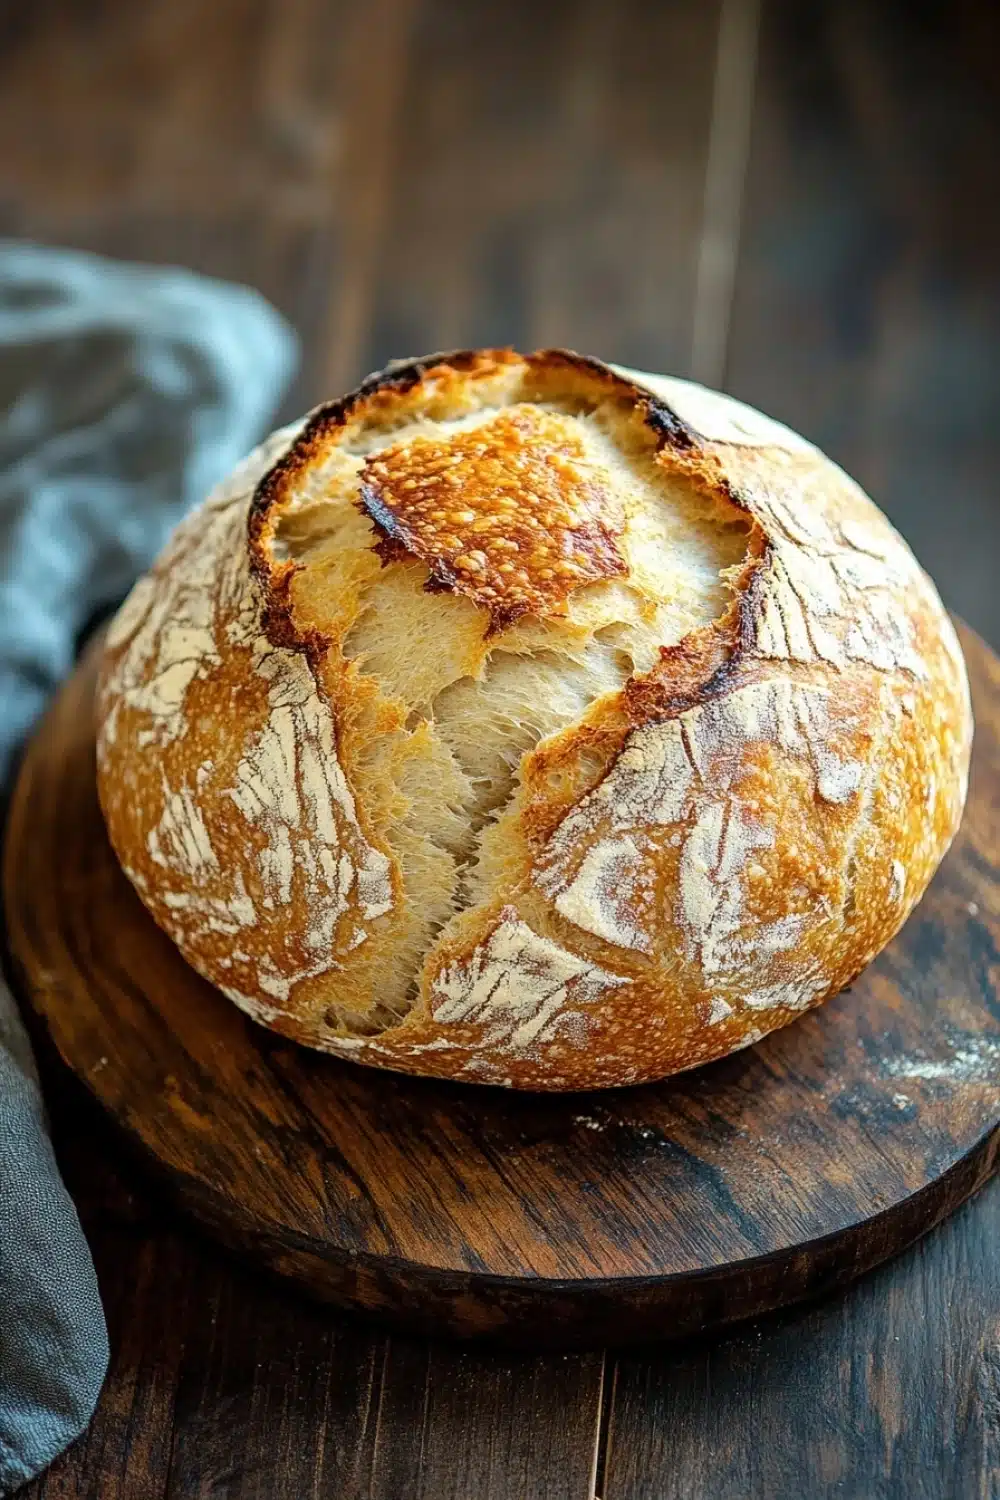
Real Life Wins from No-Knead Dutch Oven Bread
- Hands-off dough means you can prep before bed and wake up to a bubbly, ready-to-bake loaf—no elbow grease required.
- The crust? So crackly it practically snaps when you slice through; perfect for those who hate soggy bread’s sad fate.
- Using just four ingredients—no fancy stuff—makes it wallet-friendly and foolproof for weeknight bakers.
- Baking in a preheated Dutch oven traps steam like a pro bakery oven would, giving your bread that hard-to-achieve artisan crunch.
- Leftovers freeze like a charm; toast ‘em straight from the freezer for a quick, fresh-baked taste anytime.

No-Knead Dutch Oven Bread
- Total Time: 2 hours
- Yield: 8 slices 1x
Description
A simple and rustic no-knead bread baked in a Dutch oven, resulting in a crusty exterior and soft, airy interior. Ready in about 2 hours with minimal hands-on time.
Ingredients
3 cups (360 grams) all-purpose flour
1/4 teaspoon instant yeast
1 1/4 teaspoons salt
1 1/2 cups (360 ml) warm water (about 110°F / 43°C)
Instructions
In a large mixing bowl, combine the flour, instant yeast, and salt.
Add the warm water to the dry ingredients and stir with a wooden spoon or spatula until a shaggy, sticky dough forms and all flour is incorporated.
Cover the bowl tightly with plastic wrap or a clean kitchen towel and let it rest at room temperature for 12 to 18 hours, until the surface is dotted with bubbles and the dough has doubled in size.
After the dough has risen, generously flour a clean work surface and your hands. Turn the dough out onto the floured surface.
With floured hands, gently fold the dough over on itself once or twice to shape it into a rough ball. Do not knead.
Place a large piece of parchment paper on a kitchen towel and dust it with flour. Place the dough seam side down on the parchment paper and cover it with the towel. Let it rest for 1 to 2 hours, until it has nearly doubled in size.
About 30 minutes before the dough is ready, place a 5- to 6-quart Dutch oven with its lid in the oven and preheat to 450°F (230°C).
Carefully remove the hot Dutch oven from the oven. Lift the dough with the parchment paper and place it into the Dutch oven.
Cover with the lid and bake for 30 minutes.
Remove the lid and bake for an additional 15 minutes, until the bread is deep golden brown and crusty.
Remove the bread from the Dutch oven and let it cool completely on a wire rack before slicing.
- Prep Time: 15 minutes
- Cook Time: 45 minutes
Explore more:
Breakfast Recipes
Mastering No-Knead Dutch Oven Bread: Tricks, Swaps & Fixes
The Flour Game: Swapping Without Losing Your Mind
Okay, so you’ve got your all-purpose flour ready, but maybe you’re itching to try something different—because hey, variety is the spice of baking life. Here’s the lowdown: all-purpose flour is the backbone here, giving you that chewy crumb and sturdy crust. But what if you want to throw whole wheat or bread flour into the mix? Whole wheat will bulk up the flavor and add a bit more density, but beware—too much and your loaf turns into a brick quicker than a New York minute. I usually stick to swapping no more than 25% of the flour with whole wheat to keep the airiness intact.
Bread flour, on the other hand, loves to show off its higher protein content, making the gluten stronger—even in a no-knead scenario. It’ll give you a slightly taller rise and a chewier texture. But don’t go full throttle; too much and your dough might feel like it needs a workout (which defeats the no-knead point). And if you’re really adventurous, try a sprinkle of rye flour for that rustic, tangy vibe—just a small scoop to avoid a dense loaf that’s more like a doorstop.
Why the Long Wait? The Magic Behind the 12-18 Hour Rise
This is where the magic brews—slow fermentation. You see, that long, lazy rise at room temp isn’t just a snooze fest; it’s the secret sauce for flavor and texture that punches way above its weight. The instant yeast works overtime, munching on sugars in the flour, releasing gases that puff up the dough, and developing those complex, mildly tangy notes that make each bite sing. It’s like letting a fine whiskey age—time mellows and deepens the character.
And slow fermentation means less elbow grease. Unlike traditional bread that demands kneading and folding to develop gluten, this method lets time do the heavy lifting. Plus, that sticky, shaggy dough you’re staring at? That’s exactly what you want—it’s a good sign the gluten network is setting up without you having to muscle through it.
Pro tip: Keep the dough covered tight. No drying out. It’s a little like tucking in a baby—moisture is key to a good rise and that elusive crust later.
Oops! My Bread Flopped—Fixing The Common No-Knead Blunders
Seen a dough that refused to rise? Or a loaf that came out flatter than a pancake? Been there. The devil is in the details.
First, temperature is the silent culprit. If your water’s too hot, you’ve basically nuked your yeast. Too cold, and the yeast is like a lazy cat—no motivation to work. Aim for that sweet spot around 110°F/43°C. I keep a digital thermometer handy; no guesswork.
Second, don’t skip the patience game. Under-proofed dough won’t puff, over-proofed dough collapses. Watch for those bubbly signs on the surface—they’re your bread’s way of waving hello, telling you it’s ready for the next step.
Lastly, handling matters. Resist the urge to knead. Just gentle folds—like you’re folding a letter to Grandma. If you go all Hulk on it, you’ll deflate the bubbles and kill the airy structure.
And hey, if your crust comes out pale and sad? That’s your Dutch oven temperature playing hard to get. Crank up to a scorching 450°F (230°C), preheat that pot with lid on, and let the steam trapped inside do its voodoo for a crust that snaps when you break it.
No-Knead Dutch Oven Bread: FAQ
A: Yes, that long rest is the secret sauce. It lets the yeast work its magic slowly, giving you those glorious bubbles and that airy crumb we all crave.
A: You can, but you’ll want to proof it first in the warm water to wake it up—unlike instant yeast, which just goes straight in the mix. Otherwise, your bread might turn out a bit denser.
A: Nope. You can try a heavy pot with a lid or even a cast-iron skillet covered tightly with foil. The goal is to trap steam to get that crispy crust.
A: The dough’s long rest is doing all the heavy lifting. Over-kneading can toughen your bread instead of tenderizing it. Trust the process—your hands deserve a break.
A: Freeze slices in airtight bags for up to 3 months. Toast straight from frozen—no thawing needed. Bread on demand, no fuss.