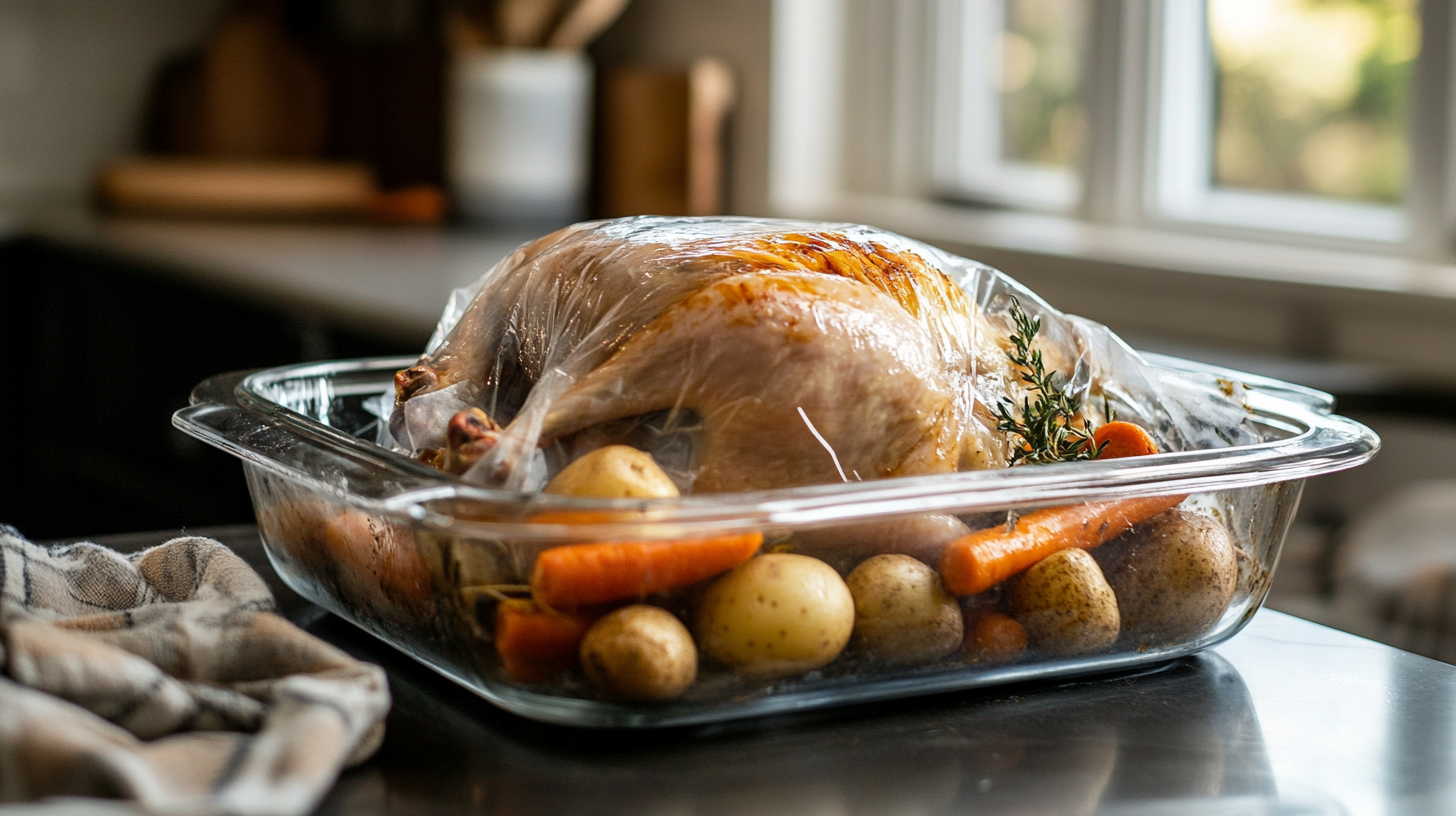
If you’re tired of dry, overcooked chicken or cleaning up oily stovetops, you’re going to love what Reynolds cooking bags can do. These game-changing oven bags lock in moisture, cut down on cleanup, and give you flavorful, juicy results every single time. Whether you’re cooking for a busy weeknight or prepping a cozy Sunday dinner, these Reynolds Cooking Bag chicken recipe ideas are your ticket to easy, stress-free meals.
Reynolds cooking bags aren’t just about convenience—they’re about cooking smarter. They act like a mini-oven within your oven, trapping heat and moisture to steam your chicken from the inside out. That means no basting, no flipping, and definitely no dry meat. And since everything cooks inside the bag, cleanup’s as easy as tossing the used bag away.
So if you’re looking for an effortless way to level up your chicken recipes—especially ones that don’t skimp on flavor—you’re in the right place. In this guide, we’re diving deep into the best Reynolds cooking bag recipes chicken fans love, flavor variations, top cooking tips, and even what to serve on the side.
Table of Contents
Why Use Reynolds Cooking Bags for Chicken Recipes?
Alright, let’s get real—chicken can be tricky. Overcook it, and it’s dry. Under-season it, and it’s bland. That’s where Reynolds cooking bags come in. These oven-safe bags do more than just hold your ingredients; they create a sealed environment that locks in every drop of juice and infuses your chicken with full-bodied flavor. This is the kind of hands-off cooking that gives you chef-level results without the stress.
The magic? Moist heat. As the chicken cooks, it releases natural juices. Normally, those juices might evaporate or leak out. But in a Reynolds cooking bag, they stay right where they belong—surrounding the chicken and keeping it incredibly tender.
Plus, the cleanup is ridiculously easy. You don’t need a roasting pan full of water or foil wrapping tricks. Just prep, toss everything in the bag, pop it in the oven, and boom—dinner’s done.
And if you’re meal prepping or juggling a packed schedule, using Reynolds cooking bag recipes chicken style means you can batch cook like a pro. You can even try some of these ideas alongside other favorites like low sodium chicken recipes or bariatric chicken recipes for specific dietary goals.
Essential Tools and Ingredients You’ll Need
Let’s talk setup. You don’t need fancy equipment to get started—just a few kitchen basics and your trusty Reynolds oven bags.
Tools:
- Reynolds Oven Cooking Bags (Turkey-size works best for whole chicken)
- 9×13 inch baking dish or roasting pan
- Sharp knife for prepping
- Tongs or large spoon (for easy serving)
- Meat thermometer (optional but helpful for checking doneness)
Core Ingredients:
- 1 whole chicken (or 4–6 bone-in pieces)
- Olive oil or melted butter
- Garlic (fresh or powder)
- Onion slices
- Carrots and potatoes (for a full one-bag meal)
- Salt and pepper
- Herbs (like rosemary, thyme, or Italian seasoning)
What’s awesome about these Reynolds cooking bag recipes chicken setups is how flexible they are. Got boneless thighs? Use ‘em. Want to spice it up? Try smoked paprika or Cajun seasoning. And if you’re aiming for ultra-savory, go bold with garlic butter or onion soup mix.
Looking to pair this method with something creative? You might also like ground chicken pasta recipes for a fun twist on leftovers.
How to Prep Chicken for Reynolds Cooking Bag Recipes
Before you get cooking, let’s talk prep. The key to getting that juicy, melt-in-your-mouth chicken from a Reynolds cooking bag is proper seasoning and arrangement. Whether you’re cooking a whole bird or just pieces, a little prep goes a long way.
First, pat your chicken dry with paper towels. This helps the seasonings stick better and prevents excess moisture from watering down your flavors. Next, drizzle a little olive oil or melted butter over the chicken. This not only adds flavor but also helps create that golden finish—even inside the cooking bag.
Seasoning is totally customizable. The beauty of Reynolds cooking bag recipes chicken style is how adaptable it is to different flavor profiles. A classic combo? Garlic, rosemary, thyme, and a hint of paprika. Want a citrusy kick? Add lemon slices and fresh parsley.
If you’re adding veggies (and I recommend you do), cut them into evenly sized pieces so they cook at the same rate. Think potatoes, carrots, onions, or bell peppers. Toss them with a bit of oil, salt, and pepper before adding to the bag.
Once everything’s seasoned, place the Reynolds cooking bag in a baking dish, open side up. Add a tablespoon of flour inside the bag and shake it gently—this helps prevent the bag from bursting during cooking. Then layer your veggies at the bottom, chicken on top, and seal it with the provided tie.
And just like that, your Reynolds cooking bag chicken dinner is prepped and ready to cook—no mess, no stress.
The Perfect Reynolds Cooking Bag Chicken Recipe (Step-by-Step)
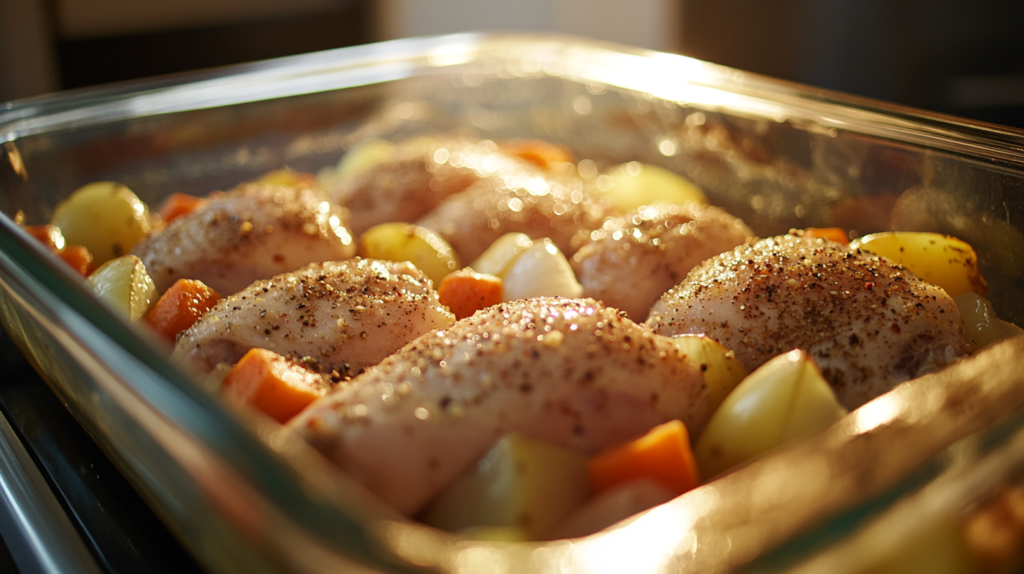
This is the go-to recipe that’ll make you wonder why you didn’t start using cooking bags sooner. It’s easy, flavorful, and comes out perfectly every time.
Ingredients List
- 1 whole chicken (4–5 lbs) or 4–6 bone-in thighs or drumsticks
- 1 large onion, sliced
- 3 carrots, peeled and chopped
- 3 medium potatoes, cubed
- 2 tablespoons olive oil or melted butter
- 1 tablespoon garlic powder
- 1 teaspoon paprika
- 1 teaspoon dried thyme
- Salt and black pepper to taste
- 1 tablespoon all-purpose flour (for the bag)
- Optional: lemon slices, rosemary sprigs
Step-by-Step Instructions
- Preheat oven to 350°F (175°C).
- Pat chicken dry and coat it in olive oil or melted butter.
- Season generously with garlic powder, paprika, thyme, salt, and pepper.
- Prep your veggies and toss with a little oil and seasoning.
- Place a Reynolds Oven Bag in a 9×13 inch baking dish. Add 1 tablespoon flour to the bag, shake to coat.
- Layer vegetables at the bottom of the bag, place seasoned chicken on top.
- Optional: tuck lemon slices or rosemary sprigs around the chicken.
- Close the bag with the provided tie, cut 4 small slits in the top for steam to escape.
- Bake for 1 hour to 1 hour 15 minutes, or until internal temp reaches 165°F (75°C).
- Let rest 5–10 minutes before slicing.
Looking to serve it up with something equally comforting? Check out this recipe for chicken pastry—a Southern classic that pairs beautifully with this one-bag wonder.
This classic Reynolds cooking bag recipes chicken meal gives you everything in one go: protein, veggies, and serious flavor with zero cleanup drama. Bonus: you can switch up the spices and sides every week to keep it fresh.
Flavor Variations for Reynolds Cooking Bag Chicken
Once you’ve mastered the basic recipe, the fun really begins. One of the best things about Reynolds cooking bag recipes chicken ideas is how easily you can switch up the flavor profile without changing the method. Whether you like things zesty, bold, or buttery, these flavor twists are effortless to pull off and incredibly satisfying.
Let’s break down a few of the top variations that’ll bring some serious excitement to your dinner table.
Lemon Herb Chicken
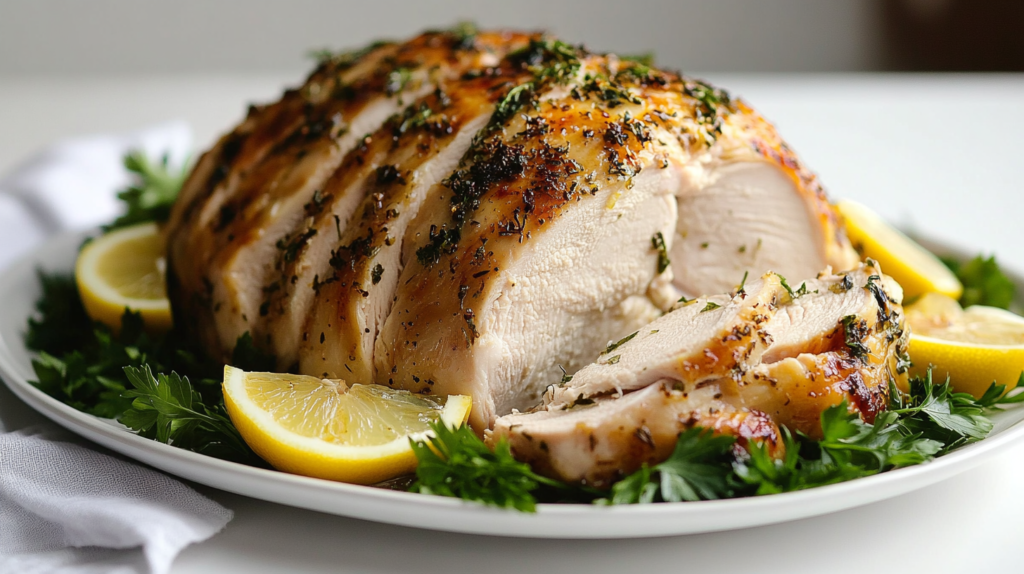
This one’s light, fragrant, and full of fresh flavor—perfect for spring or summer meals.
Ingredients:
- Chicken (whole or pieces)
- 1 lemon, sliced
- 1 tsp dried basil or Italian seasoning
- 2 tsp minced garlic
- 1 tbsp olive oil
- Salt and pepper
Instructions: Follow the same prep steps from the original recipe, but tuck the lemon slices and herbs all around the chicken. The steam from the lemons inside the Reynolds cooking bag infuses the meat with bright citrus flavor while keeping it juicy. Pair it with rice or roasted asparagus.
Want more citrusy inspiration? This chicken cottage cheese recipe is a unique spin that balances savory and creamy.
Spicy BBQ Chicken
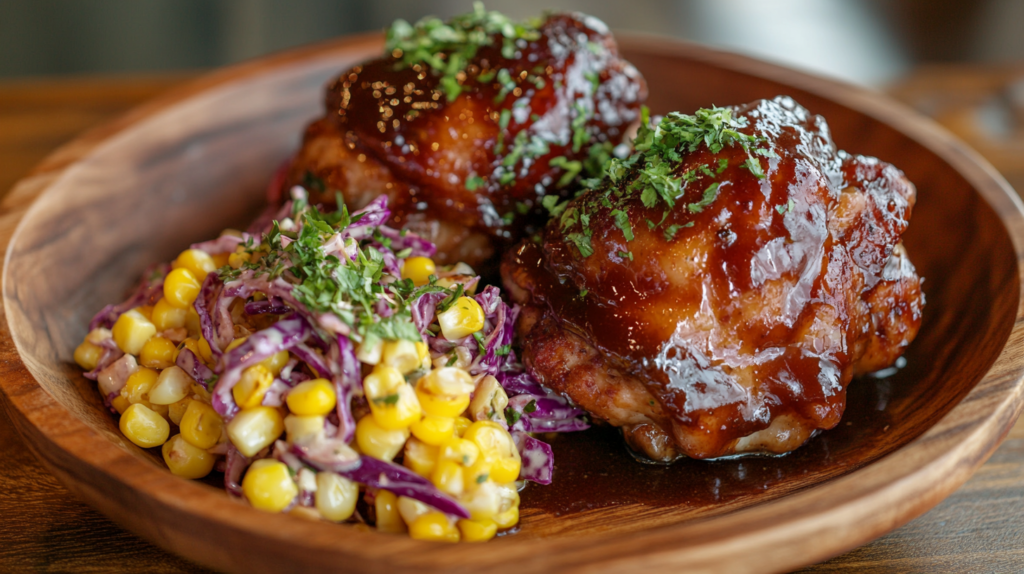
For those who like a little heat and sweet, BBQ chicken in a cooking bag is a must-try. It’s great for feeding a crowd or a game night dinner.
Ingredients:
- Chicken thighs or drumsticks
- ½ cup BBQ sauce (your favorite)
- 1 tsp smoked paprika
- ½ tsp chili flakes
- 1 tbsp brown sugar (optional for extra sweetness)
Instructions: Toss the chicken in BBQ sauce and spices before sealing it in the bag. As it cooks, the BBQ sauce thickens and caramelizes slightly—creating tender, finger-licking goodness. Serve with cornbread or slaw.
Looking for more heat? Try serving it alongside franks buffalo chicken dip for a spicy sidekick.
Garlic Butter Chicken
Comfort food at its best—rich, buttery, and loaded with garlic. This version of Reynolds cooking bag recipes chicken is cozy enough for winter dinners but fancy enough for guests.
Ingredients:
- Chicken breasts or thighs
- 3 tbsp melted butter
- 1 tbsp minced garlic
- ½ tsp thyme
- ¼ tsp ground black pepper
- Optional: fresh parsley for garnish
Instructions: Mix butter, garlic, and herbs, then pour over chicken before sealing in the bag. Add sliced potatoes for a full one-pan meal. The result is a buttery, garlicky roast that feels indulgent but is secretly super easy.
You could also use leftovers in something creative like a grilled chicken wrap the next day.
These are just a few of the many ways you can level up your Reynolds cooking bag recipes chicken routine. You can even experiment with international twists like curry spices or Mediterranean blends to keep things exciting week after week.
Tips for Juicy, Tender Chicken in Cooking Bags
If you’re aiming for fall-off-the-bone chicken with rich flavor and zero dryness, you’re already halfway there using a Reynolds cooking bag. But with a few extra pointers, you can guarantee flawless results every single time. Here’s how to get that “did-you-seriously-make-this-at-home?” level of tenderness.
1. Don’t Skip the Flour
This one’s non-negotiable. Adding 1 tablespoon of flour to the cooking bag before anything else prevents the bag from bursting by absorbing excess steam. It’s a small step but crucial for all Reynolds cooking bag recipes chicken to cook evenly and safely.
2. Use Bone-In Chicken for Maximum Flavor
While boneless chicken works fine, bone-in cuts (like thighs, drumsticks, or whole chicken) deliver deeper flavor and stay juicier. The bones conduct heat from the inside, cooking meat more evenly while keeping it moist.
3. Arrange the Ingredients Strategically
Always place dense veggies like potatoes and carrots at the bottom of the bag. They need more heat to cook through, so being closest to the dish helps. Then layer chicken on top so juices run down and flavor everything beneath.
4. Don’t Overcrowd the Bag
It’s tempting to load everything in, but overstuffing can affect how evenly your chicken cooks. For most Reynolds cooking bag recipes chicken, stick with 4–6 pieces or a single whole chicken to maintain airflow and heat circulation.
5. Let It Rest
Give your chicken 5 to 10 minutes to rest after it comes out of the oven. This allows the juices to redistribute, making every bite tender and moist.
Looking for another chicken trick that locks in flavor? These hot honey chicken tenders bring sweet heat that you can easily replicate in a bagged version.
Common Mistakes to Avoid When Using Reynolds Cooking Bags
Even though they’re super simple to use, there are a few common slip-ups that can mess with your results. Here’s what to watch for:
Cutting Too Many Vent Holes
You only need about four small slits at the top of the bag. Too many and you’ll let too much steam escape, drying out your chicken. Not enough, and you risk the bag popping from pressure buildup.
Skipping the Cooking Rack or Baking Dish
The bag needs structure underneath it. Always place it in a 9×13-inch dish or roasting pan to keep everything stable and allow heat to circulate properly.
Not Checking Internal Temp
The bag does a lot, but it’s not psychic. Use a meat thermometer if you’re unsure. For most Reynolds cooking bag recipes chicken, 165°F (75°C) is the golden number for perfectly cooked poultry.
Cooking at Too High a Temp
Stay in the 350–375°F range. Higher heat can make the bag more likely to burst and dry out lean cuts like chicken breast.
Want more dependable chicken success stories? Check out the best chicken chop recipe for pan-fried excellence you can try on the side.
Make-Ahead, Storage, and Reheating Tips
One of the best things about Reynolds cooking bag recipes chicken is that it doesn’t just save you time during cooking—it makes life easier after dinner, too. Whether you’re meal-prepping for the week or looking for delicious leftovers, here’s how to store and reheat like a kitchen ninja.
Make-Ahead Tips
Want to prep in advance? You totally can. Assemble everything in the Reynolds cooking bag—seasoned chicken, veggies, herbs—then seal it with the tie. Place the whole bag in a large bowl and refrigerate for up to 24 hours before cooking.
Pro tip: Let the bag sit at room temp for 20 minutes before baking so it cooks evenly.
This trick is perfect for busy weeknights, holidays, or even camping trips where you’ve got access to an oven. Planning ahead has never tasted so good.
Storage Instructions
Cooked chicken from your Reynolds bag is easy to store and keeps well for days.
- In the fridge: Store leftovers in an airtight container for up to 4 days.
- In the freezer: Freeze individual portions (with veggies if you like) for up to 3 months. Just be sure everything is cooled completely before freezing.
Want to give your leftovers a new twist? Try tossing chopped pieces into this chicken breakfast recipe for a next-day brunch win.
Reheating Tips
There’s nothing worse than reheated chicken that turns dry or rubbery. Thankfully, you can reheat Reynolds cooking bag recipes chicken the right way with these simple methods:
- Oven (best method): Preheat to 325°F, cover chicken with foil, and heat for 15–20 minutes until warm.
- Microwave: Place chicken with a splash of broth or water in a microwave-safe dish, cover loosely, and heat in 30-second intervals.
- Skillet: Add a small amount of oil or broth, cover, and heat on medium-low until warmed through.
Using a bag to begin with means the chicken already has great moisture, so reheating is a breeze. Bonus: reheated chicken works perfectly in wraps like these chicken cutlet sandwich recipes or tossed into a ground chicken and potato style skillet.
Serving Suggestions and Pairing Ideas
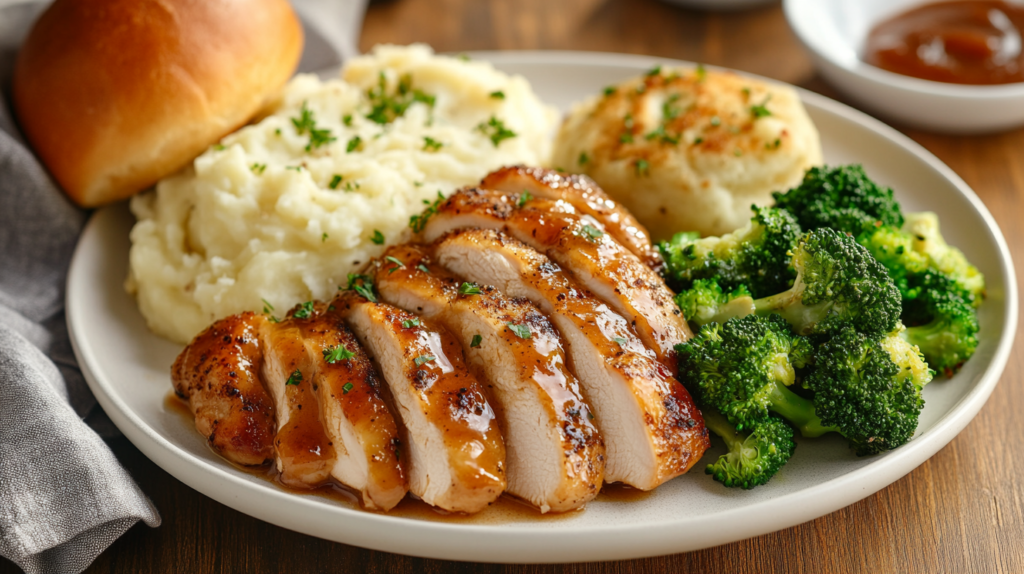
Alright, now the fun part—let’s talk sides and pairings. These Reynolds cooking bag recipes chicken options are rich and savory, so you want sides that balance or complement those cozy flavors.
Great Side Dish Ideas:
- Mashed potatoes or garlic rice for soaking up juices.
- Steamed broccoli or green beans for freshness and crunch.
- Simple salad with a zesty vinaigrette to balance the richness.
- Cornbread, rolls, or pita to round out the meal.
And don’t forget sauces! A drizzle of honey roasted BBQ sauce or even a side of buffalo chicken flatbread can elevate the meal with contrasting textures and flavors.
Whether you’re eating it fresh or digging into leftovers, serving Reynolds cooking bag recipes chicken is all about easy comfort and bold flavor.
Nutritional Benefits of Cooking Chicken in Reynolds Bags
Let’s be honest: sometimes “easy” meals aren’t the healthiest. But that’s what makes Reynolds cooking bag recipes chicken such a winner—they’re quick, low-effort, and surprisingly good for you.
1. Less Oil, Same Flavor
Because Reynolds cooking bags trap moisture and steam, you don’t need to drown your chicken in oil or butter to keep it moist. Even just a tablespoon of olive oil or a simple seasoning mix is enough to create tender, flavorful meat. You still get that rich taste—without all the extra fat.
Compare that to frying or heavy cream-based dishes and you’ve already cut down major calories and grease. That makes these recipes perfect for anyone watching their fat intake, or just trying to eat a little lighter.
2. Naturally Lower Sodium
Here’s where things get really interesting. When you cook in a sealed bag, all the flavors concentrate. That means you can often use less salt and still end up with incredibly seasoned chicken.
This is great news for those following low-sodium diets. And if that’s your jam, you’ll definitely want to check out these low sodium chicken recipes for even more smart cooking ideas.
3. Full Nutrition Retention
One thing many people don’t realize is that boiling or high-heat pan-frying often causes nutrients—especially water-soluble vitamins—to leach out of food. Since oven bags essentially steam the food in its own juices, you keep more of the good stuff inside.
That means more:
- B-vitamins (great for energy and metabolism)
- Minerals like iron and potassium
- Antioxidants (especially from added herbs, garlic, or veggies)
4. Great for Balanced Meals
Because Reynolds cooking bag recipes chicken typically include protein + vegetables in the same bag, you’re halfway to a balanced plate right from the oven. Add a whole grain like quinoa, couscous, or brown rice on the side, and you’ve got a complete, nourishing meal with zero fuss.
Trying to stay on track with fitness goals? This method works great for meal preppers, families, and even those on more restrictive plans like carnivore chicken recipes where simplicity is key.
5. Portion Control Made Easy
Another underrated benefit? When you’re cooking everything inside one sealed bag, portion control becomes way easier. You can divide the meal right after baking and store individual portions for work lunches or dinner on the go.
Plus, the ease of cleanup means you’re less tempted to skip home cooking in favor of takeout. That alone can have a big impact on your overall health and food budget.
At the end of the day, cooking with oven bags isn’t just about convenience—it’s about making smarter choices that still taste incredible. And that’s exactly what Reynolds cooking bag recipes chicken delivers every single time.
Frequently Asked Questions About Reynolds Cooking Bag Recipes Chicken
1. Can I use boneless chicken in Reynolds cooking bag recipes?
Absolutely! Boneless chicken works great in Reynolds cooking bag recipes chicken, especially if you’re short on cook time. Just keep in mind that boneless pieces tend to cook faster, so reduce the baking time by about 10–15 minutes to avoid drying them out. You’ll still get all the benefits—tender meat, infused flavors, and no mess. Just be sure to check the internal temperature hits 165°F to ensure it’s fully cooked.
2. Do Reynolds cooking bags really make chicken juicier?
Yes, and that’s exactly why Reynolds cooking bag recipes chicken are so popular. The sealed bag traps steam and natural juices, allowing the chicken to cook in its own flavorful moisture. This not only prevents drying out but also intensifies the seasoning. The result? Exceptionally juicy chicken with very little effort—no basting, no rotating, and no dry bites.
3. Are Reynolds cooking bags safe for the oven?
Yes, Reynolds oven bags are made from heat-resistant, BPA-free nylon designed specifically for oven use. They can safely withstand temperatures up to 400°F. Just follow the instructions, including adding flour to the bag and cutting vent holes. Used properly, they make Reynolds cooking bag recipes chicken both safe and simple to prepare.
4. Can I add vegetables to Reynolds cooking bag chicken recipes?
Definitely! One of the best parts about making Reynolds cooking bag recipes chicken is being able to cook your protein and veggies all in one bag. Just layer heartier veggies like carrots and potatoes on the bottom so they cook through evenly. This gives you a complete one-pan meal without any extra pots or pans to clean afterward.
5. How long do you cook chicken in a Reynolds cooking bag?
For most Reynolds cooking bag recipes chicken, cook a whole bird or bone-in pieces at 350°F for about 60–75 minutes. Cooking times will vary based on the size and cut of your chicken. Always check for doneness with a meat thermometer—165°F is the goal. Boneless cuts may cook faster, so check around the 45-minute mark to avoid overcooking.
6. What seasoning blends work best in Reynolds cooking bags?
There’s so much room to play! Some of the best blends for Reynolds cooking bag recipes chicken include garlic and herb, lemon pepper, BBQ rubs, and curry-style spices. The bag helps concentrate all those flavors, so even a basic mix of salt, pepper, garlic, and paprika goes a long way. You can also throw in fresh herbs, onion slices, or citrus for added depth.
7. Can you freeze meals made from Reynolds cooking bag recipes chicken?
Yes! Once your chicken is cooked and cooled, you can freeze individual portions for up to 3 months. Store them in airtight containers or freezer bags. These Reynolds cooking bag recipes chicken are perfect for meal prepping—you’ll have flavorful, juicy chicken ready to go for quick lunches or dinners later in the week.
Conclusion
When it comes to easy, flavorful, and stress-free cooking, Reynolds cooking bag recipes chicken really are the ultimate kitchen hack. They take the guesswork out of roasting, lock in juicy flavor, and make cleanup ridiculously simple. Whether you’re craving garlic butter chicken, lemon herb, or a spicy BBQ twist, the possibilities are endless—all while keeping your oven clean and your chicken moist.
You don’t need to be a professional chef to pull off perfect chicken every time. With just a few ingredients, a Reynolds oven bag, and your favorite seasoning blend, you’re set. These recipes are perfect for weeknight meals, weekend dinners, or make-ahead freezer-friendly options. They’re also a great way to sneak in healthy veggies and build balanced meals without the extra fuss.
Ready to upgrade your dinner game? Try one of these Reynolds cooking bag recipes chicken tonight and experience the difference for yourself. Got a favorite variation or tip? Share it with us—we’d love to hear how you make this method your own!

