
Crunch time is here.
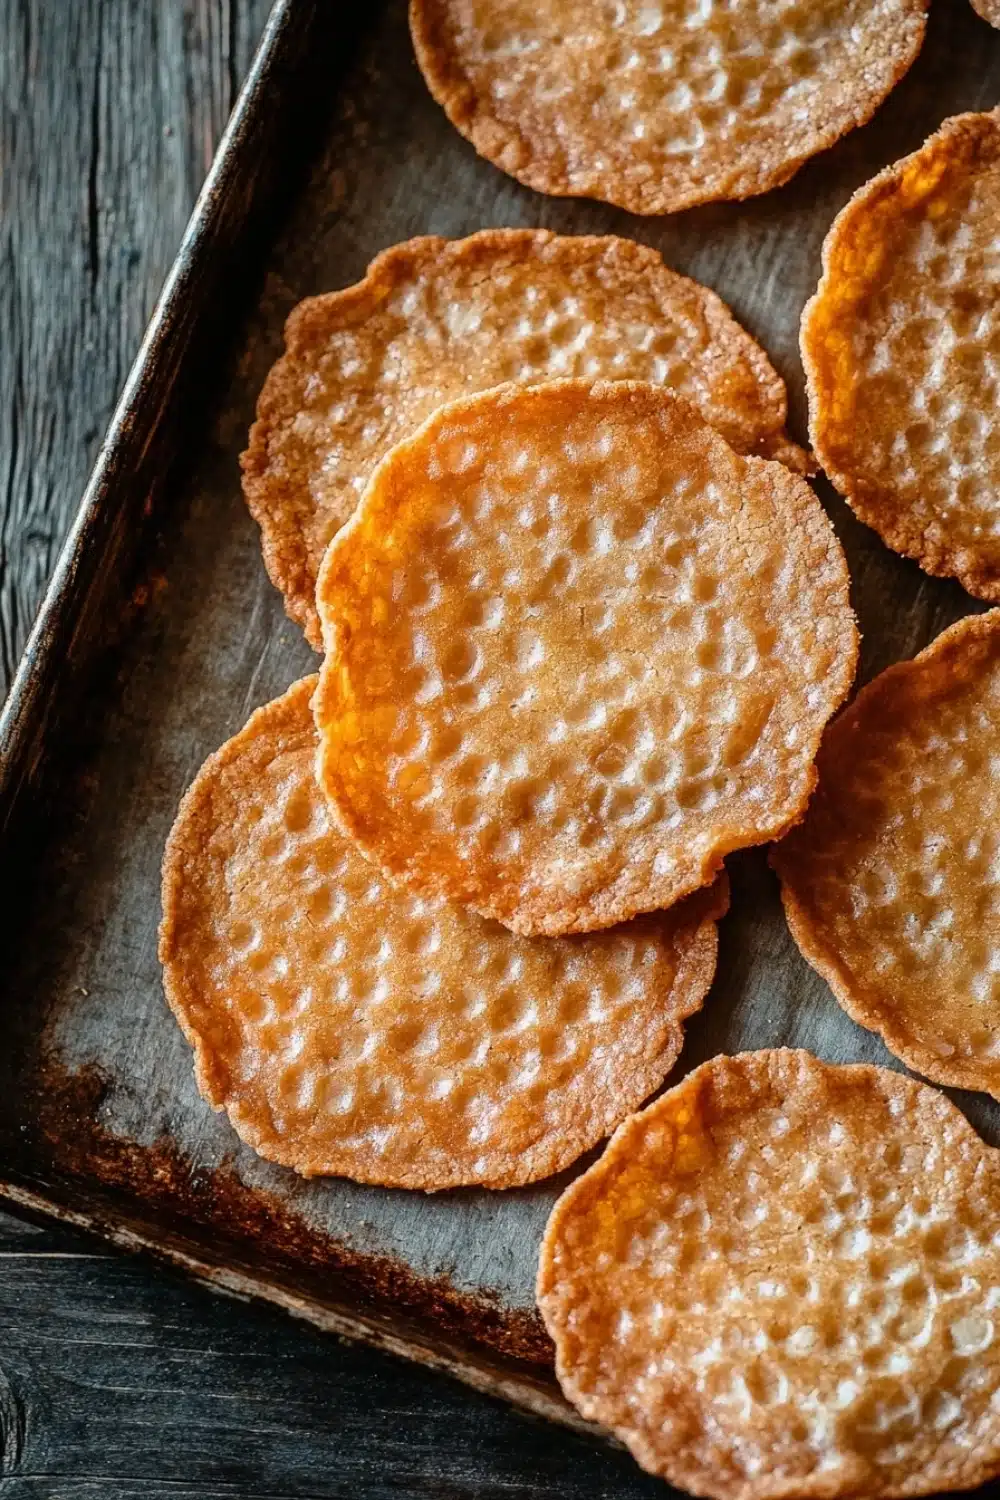
There’s something magic about a cookie that snaps crisply the moment you bite into it—no sogginess, just that satisfying crack. I’ve chased that perfect thin and crispy cookie recipe for years, testing dough consistencies and baking times until the stars aligned. This isn’t your grandma’s soft, chewy cookie; it’s a nimble, caramelized marvel that melts on your tongue like a well-played riff.
The secret lies in the balance: a careful mix of melted butter and just enough sugar to coax out caramelization without tipping into burn territory. As the cookies bake on parchment-lined sheets, they spread thin like a golden wafer, edges flirting with bronze perfection. I love how this recipe calls for gentle folding to keep the dough from toughening up—no overmixing drama here.
Once cooled, these cookies store well, crunch intact, begging for dunking into morning coffee or an afternoon tea break. Raw, honest, and gratifying—these thin and crispy cookies hit the sweet spot when you want a swift, no-nonsense treat with a punch of buttery snap.
For a warm treat that’s both quick and satisfying, try this Oatmeal Cookie in a Mug: Quick Comfort in Minutes recipe that’s perfect if you’re craving a thin and crispy cookie.
Real Life Wins with Thin and Crispy Cookies
- Perfect for when you need a quick, no-fuss sweet fix—ready in under 30 minutes from start to finish.
- That buttery caramelized crunch? It’s a guaranteed crowd-pleaser at parties or afternoon coffee breaks.
- These cookies keep their snap for days—no soggy disappointments lurking in the cookie jar.
- They freeze like champs, so you can stash extras and pull them out when the sweet tooth strikes hard.
- Simple ingredients that you probably already have on hand—no scavenger hunt through the pantry needed.

Thin and Crispy Cookies
- Total Time: 27 minutes
- Yield: 24 cookies 1x
Description
These thin and crispy cookies are delightfully crunchy with a buttery caramelized flavor. Perfect for those who love a delicate snap in every bite.
Ingredients
1 cup (200 grams) granulated sugar
1/2 cup (115 grams) unsalted butter, melted and cooled
1 large egg
1 teaspoon vanilla extract
1 1/4 cups (160 grams) all-purpose flour
1/2 teaspoon baking soda
1/4 teaspoon salt
Instructions
Preheat the oven to 350°F (175°C). Line two baking sheets with parchment paper.
In a large bowl, whisk together the granulated sugar and melted butter until combined and smooth.
Add the egg and vanilla extract to the sugar and butter mixture. Whisk until fully incorporated.
In a separate bowl, sift together the all-purpose flour, baking soda, and salt.
Gradually add the dry ingredients to the wet ingredients, stirring gently until just combined. Do not overmix.
Using a teaspoon, scoop small amounts of dough onto the prepared baking sheets, spacing them about 2 inches apart. Flatten each dough ball slightly with the back of the spoon or your fingers to encourage spreading.
Bake for 10 to 12 minutes, or until the edges are golden brown and the centers are set but still slightly soft.
Remove the cookies from the oven and allow them to cool on the baking sheet for 5 minutes before transferring them to a wire rack to cool completely. This helps them crisp up further.
Store the cooled cookies in an airtight container at room temperature for up to one week.
- Prep Time: 15 minutes
- Cook Time: 12 minutes
Explore more:
Buzz in the Kitchen Recipes
Mastering Thin and Crispy Cookies
The Butter Factor That Makes or Breaks It
Butter isn’t just butter here—it’s your secret weapon. Melted and cooled butter is the game changer; hot butter will cook the egg prematurely, resulting in flat, greasy sad faces of cookies instead of those snappy delights we’re after. I once tried swapping butter for margarine in a rush—big mistake. The cookies spread too much, lost that toasty edge, and tasted like an afterthought. Unsalted butter gives you control; salted? You risk sneaky saltiness creeping in, throwing off the whole balance. So, keep the butter neat, melted but cooled. It’s the backbone for that caramelized crunch you crave.
Why Flatten Dough Balls? A Little Science and Old School Hacks
Drop dough, flatten dough—sounds simple. But here’s the lowdown:
- Spreading: Tiny dough lumps bake thick and cakey. Flattening encourages even spreading, giving you that coveted wafer-thin crunch.
- Edge Gold: Flattened dough bakes quicker on the edges, teasing out that caramelization that makes taste buds do a double take.
- Control: Pressing dough helps you avoid the “cookie clump” cluster situation—nobody wants a batch-sized cookie mishap.
I learned this the hard way when I let my lazy side take over—plopping dough balls and crossing fingers for the best. Nope. Flatten early, flatten often.
Cookie Cracked? How to Fix Your Flat or Puffy Cookie Fiasco
Here’s the skinny on common cookie fails and how you can snap back.
Too flat? Your dough’s probably too warm or butter too liquidy—chill the dough for 20 minutes before scooping. Also, avoid over-melting butter; it needs to cool. If your oven runs hot (that sneaky oven monster), try lowering temp by 10-15 degrees and extend the bake time slightly. Too puffy and cakey? You overmixed. Next time, fold the flour in gently, whisper, don’t shout.
Pro tip: Use parchment paper instead of silicone mats for crispier bottoms—silicone traps moisture, which is the enemy of snap. The ‘cookie crack’ isn’t a failure; it’s a roadmap for your next bake tweaking session.
Thin and Crispy Cookies FAQ
Brown sugar will add moisture and chewiness, so it’s not the best swap if you want that classic thin crispness. Stick to granulated sugar for the snap factor.
Yes, they do spread a fair bit—that’s the whole point! Flattening the dough balls before baking helps them get that perfect thin shape with crispy edges.
Absolutely. You can prepare the dough and refrigerate it for up to 24 hours. Just remember to let it come to room temp a bit before scooping and baking for even spreading.
No, these cookies are not gluten-free because they use all-purpose flour. For a gluten-free version, you’d need to experiment with a suitable alternative flour blend.
To keep that snap on point, store your cookies in an airtight container with a piece of parchment paper between layers. Avoid airtight containers with plastic wrap only—they trap moisture and make cookies soggy.