
Snap it before it’s gone.
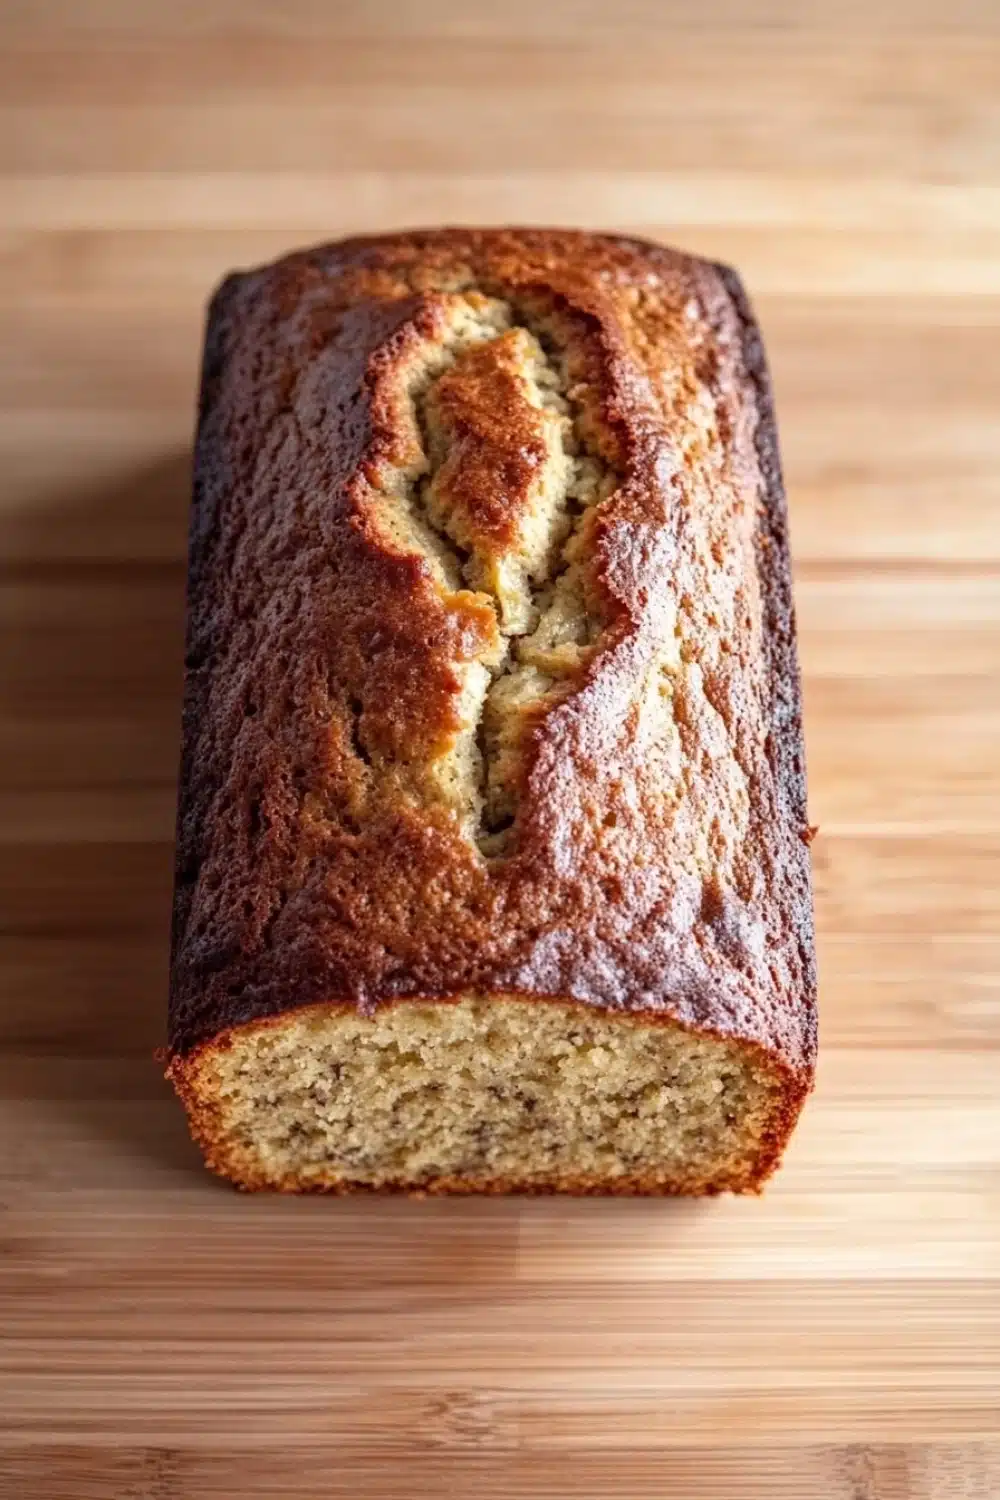
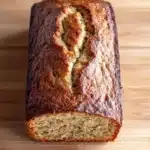
There’s a certain magic in photographing a banana cake loaf just out of the oven—the steam rising, the golden crust catching the late afternoon light, that moist crumb promising sweet comfort. I often find myself hovering over my kitchen counter, camera in one hand, fork in the other, torn between getting the perfect shot and diving right in.
Setting the scene matters. I like to scatter a few crumbs, let a stray banana slice linger nearby, and shoot with natural light pouring through the window. The balance of shadows and highlights can make or break your shot; you want to tease the texture, the slight caramelization on top, without losing the softness inside. It’s about storytelling—showing the cake’s journey from ripe bananas to a loaf that whispers stories of cozy mornings and lazy afternoons.
These moments are fleeting, so you gotta hustle—like a baker’s hustle during the last 10 minutes of bake time. That’s the real hustle behind banana cake loaf photography, and frankly, it’s worth every snap.
If you’re interested in baking, you might also enjoy our Quick Homemade Bread with Self-Rising Flour: Easy & No-Fuss Loaf for a simple and delicious treat.
Real Life Benefits of This Banana Cake Loaf
- Breakfast lifesaver—grab a slice for a quick, energy-packed start when mornings hit hard and time’s tight.
- Uses overripe bananas, so you’re not tossing those brown beauties; zero waste, max flavor.
- Simple ingredients, no fancy pantry raids needed—perfect for the ‘I forgot to shop’ days.
- Moist texture that stays soft for days, making it great for prepping ahead without turning into a desert brick.
- Versatile enough for dessert or a snack, no need to settle for boring toast or a sad granola bar.
Banana Cake Loaf
- Total Time: 1 hour 5 minutes
- Yield: 8 1x
Description
A moist and flavorful banana cake loaf made with ripe bananas, perfect for breakfast or dessert. This easy-to-make loaf combines the natural sweetness of bananas with a tender crumb and subtle vanilla notes.
Ingredients
3 ripe bananas, mashed
1 cup granulated sugar
1/2 cup unsalted butter, softened
2 large eggs
1 teaspoon vanilla extract
1 1/2 cups all-purpose flour
1 teaspoon baking powder
1/2 teaspoon baking soda
1/4 teaspoon salt
1/2 cup whole milk
Instructions
Preheat the oven to 350°F (175°C). Grease and flour a 9×5-inch loaf pan.
In a large mixing bowl, cream together the softened butter and granulated sugar until light and fluffy.
Add the eggs one at a time, beating well after each addition.
Stir in the vanilla extract and mashed bananas until combined.
In a separate bowl, whisk together the all-purpose flour, baking powder, baking soda, and salt.
Gradually add the dry ingredients to the banana mixture, alternating with the whole milk, beginning and ending with the dry ingredients. Mix until just combined; do not overmix.
Pour the batter into the prepared loaf pan and smooth the top with a spatula.
Bake in the preheated oven for 50 minutes, or until a toothpick inserted into the center comes out clean.
Remove the loaf from the oven and let it cool in the pan for 10 minutes.
Transfer the loaf to a wire rack to cool completely before slicing.
- Prep Time: 15 minutes
- Cook Time: 50 minutes
Explore more:
Breakfast Recipes
Banana Cake Loaf: Mastering Moistness & Fixing the Flops
The Banana’s Role: Why Ripe Means Right
Ever wonder why your banana cake sometimes falls flat—literally? It’s all about picking those bananas that are borderline embarrassingly ripe. When the peel’s speckled brown, the starch has fully converted into sugars, giving your loaf natural sweetness and that tender crumb everyone raves about. I once tried baking with just barely yellow bananas—turned out dry and crumbly. Rookie move. The sugars in those golden beauties not only sweeten the batter but also hold onto moisture, making the difference between a sad, crumbly slice and a loaf that practically begs for seconds. Pro tip? Mash those bananas thoroughly; lumps can cause uneven pockets and weird texture hiccups.
Swapping Ingredients Without Losing the Magic
Butter on hand is low? Don’t sweat it—you can swap in an equal amount of coconut oil or even plain yogurt. Each brings a different vibe. Coconut oil adds a subtle nuttiness and keeps things lush, while yogurt amps up the tang and moisture. Sugar? Brown sugar is your friend here if you want a deeper, molasses-y punch, but it can make the batter wetter, so ease up on the milk a bit. Milk itself? Whole milk is standard for richness, but almond or oat milk can take a loaf into allergy-friendly territory without sacrificing texture. Just avoid skim milk—the loaf tends to come out drier. Eggs? If you’re out, a flax egg works but expect a slightly denser crumb. Swaps are your jam, but remember: small tweaks, big impact.
When Things Go South: Common Banana Cake Blunders—and How to Fix ’Em
Let’s talk about the classic banana cake fails that haunt every kitchen nightmare. First up: dry, tough slices. Usually, that’s overmixing in disguise—when you whip the flour in too hard, gluten wakes up and throws a party your loaf didn’t RSVP to. Solution? Fold gently and stop as soon as the flour disappears. Second flop: the dense, gummy middle. That’s underbaking or maybe too much banana. Don’t skip the toothpick test, and if your bananas are mega-ripe, cut back on their quantity by a quarter. Third issue: a sunken center—hello, too much baking soda or oven door slamming. Keep your cool (and your oven door closed), measure carefully, and maybe toss in a pinch less leavener if your loaf’s a repeat sinker.
Banana Cake Loaf FAQs
A: Absolutely! Brown sugar adds a bit of molasses tang and extra moisture, giving the loaf a deeper flavor punch. I sometimes swap it in when I want that old-school bakery vibe.
A: Nope. You can sub with any milk—skim, almond, even oat—though whole milk keeps things rich and tender. Just don’t go too skinny on the fat or the crumb might turn a bit dry.
A: The riper, the better. Spotty, mushy bananas are the jackpot here—they pack max sweetness and moisture. If your bananas are still a little firm, toss them in a paper bag for a day or two to speed things up.
A: Yes and no. You can swap the all-purpose flour for a 1:1 gluten-free blend, but watch your mix-ins and baking time closely because gluten-free flours vary a ton. Expect a slightly different crumb, but still tasty.
A: Yes! Store it airtight at room temp for up to 3 days. Freeze if you want to stash it longer. I once froze half a loaf and it thawed like a champ—no weird texture shifts.